The fight against piracy is gaining new momentum, right holders and government agencies are redoubling their efforts in this difficult matter. I suppose each of us thought about how to protect personal files from encroachment by "unexpected guests", and simply too inquisitive persons.
Introduction
We will encrypt disks using standard Ubuntu tools, and the encryption key, like the /boot partition, will be placed on a removable drive. But why encrypt the root partition? After all, you can only encrypt /home? There are several reasons for this. The first is that some information can be retrieved from /etc based on the configuration files, even if it is not related to confidential data. The second is that if you suddenly become interested in the contents of the disk, you can always say that everything happened and that the disk was already full of pseudo-random data. So, what is needed for this?
- Flash drive with MBR
- Ubuntu 12.10
- Blank hard drive
We will use AES as a disk encryption algorithm, since it is accepted as a standard and crypto-resistant, and cryptsetup / LUKS as a means. To be able to add free space on top of the encrypted volume, we will use logical volumes (LVM).
Create an encrypted volume
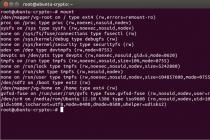
After booting from the LiveCD, you need to prepare a flash drive: create a second partition on it, where /boot and the encryption key will be placed. By creating the /boot partition with the ext2 file system as the second, we kill two birds with one stone - the first partition will be visible in all systems, and data can be stored on it, and the second one from Windows cannot be seen so easily, which adds inconvenience to the curious. For partitioning, I used gparted, but no one bothers you to use, for example, fdisk. After that, you need to mount the newly created partition and generate a key file:
Why read one byte at a time? The fact is that the pool of random numbers in the kernel is relatively small and does not always contain a sufficient amount of random data, so the mouse was moved randomly during generation.

Let's see what this command does. The first key specifies the type of hash function to be used to hash the master key. The second key specifies the encryption algorithm and type. I will dwell on this in a little more detail. What is CBC? As you know, AES is a block cipher that operates in blocks of 128, 192 or 256 bits. But, as a rule, much larger amounts of information are encrypted. And the problem arises - how to encrypt so that a non-random distribution is not visible, from which a cryptanalyst can extract information. Smart people solved it this way: the first block contains IV - a random set of bits. And each subsequent block of open data is XORed with the previous block of already encrypted data. Everything seems to be fine, but in the case of disk encryption, such a scheme, for obvious reasons, is not applicable (you won’t wait 10–20 minutes each time until the system decrypts the section you need?). In LUKS, ESSIV is used to solve the problem of random access to information - relatively small blocks of data are encrypted (sector by sector), and the initialization vector is generated based on the sector number and key hash. Such a scheme also protects against some crypto-attacks. In particular, this is why I use LUKS. After confirming our intentions after running the previous command, we create a mapping of the LUKS device:
# cryptsetup -d=/mnt/boot/key.bin luksOpen /dev/sdd cryptodisk |
The first stage of preparation is completed - now the cryptodisk device has appeared in the /dev/mapper directory, which can be treated like a regular disk.

Create LVM on top of an encrypted volume
In principle, now you can install Ubuntu on the newly created cryptodisk, but, as I already wrote, in order to be able to increase the space, it is better to create an LVM volume on top of it, which we will do. Let's initialize the physical volume and create a volume group:
Now you can format them into file systems. You are free to choose yourself, but I used the good old ext4 both for the root volume and for vg-home - in my opinion, we have already cheated too much to use newer file systems:
We only need to install Ubuntu on an unencrypted partition/disk and move it to an encrypted one.
Preparing and migrating Ubuntu
Now we put Ubuntu on an unencrypted disk - do the configuration to your liking, except for the placement of /boot and bootloader. They must be placed on a flash drive, where you created the appropriate section in advance. After that, we boot from the flash drive to check if everything has risen correctly, install the lvm2 and cryptsetup packages using apt-get - they were removed automatically after installing Ubuntu - and add / change the lines /etc/fstab. You should get something like this (except for the lines with pseudo-file systems, which, however, do not exist in modern systems):
/etc/fstab UUID=dd7ca139-074a-4b1b-a116-3a42feab7459/boot ext2 defaults 0 2 /dev/mapper/vg-root/ext4 errors=remount-ro 0 1 /dev/mapper/vg-home/home ext4 defaults 0 1 / dev / mapper / vg - swap none swap sw 0 0 |

We mount the /boot partition by UUID so that when adding new disks there is no confusion with their names. Now we go to the /etc/crypttab file, we have it with the following content:
Let's create a script in order not to mount the USB flash drive once again:
Copy the key and cryptsetup
cp / boot / key .bin $ ( DESTDIR ) / etc / crypto copy_exec / sbin / cryptsetup / sbin |
And the actual script for connecting the cryptodisk (runs during initrd boot):
/etc/initramfs-tools/scripts/local-top/cryptokeys. . . modprobe - b dm_crypt while ! /sbin/cryptsetup -d=/etc/crypto/key.bin luksOpen /dev/disk/by-uuid/c34e4c91-1fa1-4802-88ca-9c3be5c99097 cryptodisk ; do echo "Try again..." done |
The while loop is necessary if you later add volume unlocking with a password. Both scripts must be executable, otherwise the next command will not see them and will create a standard image. Now you can issue the initrd update command:
# update initrd -u -k all -v |
We almost forgot about the bootloader config. There are two ways to edit it: one is simple but wrong - direct editing of the /boot/grub/grub.cfg file, the second is also simple, but this time correct. The incorrectness of the first method is that with each kernel update, the config is overwritten using scripts from /etc/grub.d/. We will go the other way - we will add a script that will generate the correct lines in the real Grab config. However, there is one “but” - when updating the kernel, you will either have to change it every time, or stay on the old one (the latter, in my opinion, is preferable - see sidebar). This is what his lines look like:
/etc/grub .d/40_custom menuentry "Ubuntu crypto" ( recordfail = 1 if [ - n $ ( have_grubenv ) ] ; then save_env recordfail ; fi set quiet = 1 insmod part_msdos insmod ext2 insmod gzio |
UUID is taken from a pre-recorded file
search -- no - floppy -- fs - uuid -- set = root dd7ca139 - 074a - 4b1b - a116 - 3a42feab7459 |
The /boot partition is considered the root partition for Grub, so the paths to the kernel and the initrd image are relative to it.
Optionally, you can turn off the menu items you do not need. To do this, simply remove the execute permission from all unnecessary scripts in /etc/grub.d/. Now you can update the main config:
After copying, you can try to boot from the flash drive - just select the Ubuntu crypto menu item. If everything went well, after a while you will see a login prompt. In that case, I can congratulate you - you are already working in an encrypted system.

Add/Change Keys
Let's say you need to change the key - you compromised it or just created a change policy and want to strictly follow it. What is needed for this? First of all, make a backup copy of the LUKS volume header - if everything goes well, after changing the key, you can destroy it. We do it, of course, on an unencrypted partition:
We look at the current keylots (the places in the header of the encrypted volume where the keys are stored - yes, there can be more than one) and remember the number of the active one (Enabled). Typically, this is zero.
Security and privacy are very important for those who store important data on a computer. Your home computer is safe, but with a laptop or other portable devices, the situation is very different. If you carry your laptop with you almost everywhere and unauthorized persons can access it, the question arises - how to protect your data from someone else's interference. It is from physical attacks, where anyone can try to get data from a USB drive or laptop hard drive by simply picking up the device or, in the case of a laptop, pulling out the hard drive and connecting it to another operating system.
Many businesses and even ordinary users use disk encryption in linux to protect sensitive information such as customer details, files, contact information, and more. The Linux operating system supports several cryptographic methods to protect partitions, individual directories, or the entire hard drive. All data, in any of these ways, is automatically encrypted and decrypted on the fly.
Encryption at the file system level:
- 1. eCryptfs is a Linux cryptographic file system. It stores the cryptographic metadata for each file in a separate file so that files can be copied between computers. The file will be successfully decrypted if you have the key. This solution is widely used to implement an encrypted home directory, for example in Ubuntu. ChromeOS also transparently embeds these algorithms when using network-attached storage devices (NAS).
- 2.EncFS- provides an encrypted file system in user space. It runs without any additional privileges and uses the fuse library and a kernel module to provide a file system interface. EncFS is free software and is licensed under the GPL.
Block encryption at the device level:
- Loop-AES is a fast and transparent file system and swap partition encryption package for Linux. The source code of the program has not changed for a long time. It works with 4.x, 3.x, 2.2, 2.0 kernels.
- TrueCrypt is a free and open source disk encryption solution for Windows 7/Vista/XP/Mac OS X operating systems as well as Linux.
- dm-crypt+LUKS- dm-crypt is a transparent subsystem for disk encryption in kernel 2.6 and later. Supports encryption of entire drives, removable media, partitions, RAID volumes, software, logical volumes, and files.
In this tutorial, we'll look at hard drive encryption on Linux using the Linux Unified Key Setup-on-disk-format (LUKS) algorithm.
How does LUKS work?
LUKS (Linux Unified Key Setup is a block device encryption protocol. But we have gone far ahead to understand how it works, you need to download and understand other technologies used in this method.
The dm-crypt kernel module is used to encrypt a linux disk. This module allows you to create a virtual block device in the /dev/mapper directory with encryption that is transparent to the file system and the user. In fact, all data lies on an encrypted physical partition. If the user tries to write data to the virtual device, it is encrypted on the fly and written to the disk; when reading from the virtual device, the reverse operation is performed - the data is decrypted from the physical disk and transmitted in clear text via the virtual disk to the user. Usually, the AES method is used for encryption, because most modern processors are optimized for it. It is important to note that you can encrypt not only partitions and disks, but also ordinary files by creating a file system in them and connecting a device as a loop device.
The LUKS algorithm determines what actions and in what order will be performed while working with encrypted media. The Cryptsetup utility is used to work with LUKS and the dm-crypt module. We will consider it further.
Cryptsetup utility
The Cryptsetup utility will make it easy to encrypt a Linux partition using the dm-crypt module. Let's install it first.
On Debian or Ubuntu, use this command to do this:
apt-get install cryptsetup
On Red Hat-based distributions, this would look like this:
yum install cryptsetup-luks
The syntax for running the command is:
$ cryptsetup options operation op_options
Consider the basic operations that can be done using this utility:
- luksFormat- create encrypted luks linux partition
- luksOpen- connect a virtual device (you need a key)
- luksClose- close luks linux virtual device
- luksAddKey- add encryption key
- luksRemoveKey- delete encryption key
- luksUUID- show partition UUID
- luksDump- back up LUKS headers
The parameters of the operation depend on the operation itself, usually it is either a physical device with which you want to perform an action, or a virtual one, or both. Not everything is clear yet, but in practice, I think you will understand everything.
Linux Drive Encryption
The theory is passed, all the tools are ready. Now consider encrypting a linux partition. Let's move on to setting up the hard drive. Please note that this will delete all data from the drive or partition you are about to encrypt. So if there is important data there, it is better to copy it to a more reliable place.
Section creation
In this example, we will be encrypting the /dev/sda6 partition, but you can use the entire hard drive instead, or just one file filled with zeros. Create an encrypted partition:
cryptsetup -y -v luksFormat /dev/sda6
WARNING!
========
This will overwrite data on /dev/sda6 irrevocably.
Are you sure? (Type uppercase yes): YES
Enter LUKS passphrase:
Verify passphrase:
command successful.
This command will initialize the partition, set the initialization key and password. Specify such a password so that you do not forget it later.
Run the following command to open the newly created partition using the dm-crypt module in /dev/mapper, for this you will need to enter the password with which luks linux was encrypted:
Enter passphrase for /dev/sda6
Now you can see the new virtual device /dev/mapper/backup2 created using the luksFormat command:
ls -l /dev/mapper/backup2
To view the device status, run:
cryptsetup -v status backup2
/dev/mapper/backup2 is active.
type: LUKS1
cipher: aes-cbc-essiv:sha256
keysize: 256 bits
device: /dev/sda6
offset: 4096 sectors
size: 419426304 sectors
mode: read/write
command successful.
And with the following command, you can backup the LUKS headers just in case:
cryptsetup luksDump /dev/sda6
Well, we can say that the section is ready. And best of all, you can now use it just like any other normal partition in the /dev directory. It can be formatted using standard utilities, write data to it, change or check the file system, and so on. You can't just change the size. That is, everything is completely transparent, as stated at the beginning of the article.
Partition Formatting
Let's format the drive first. For reliability, in order to erase all the data that was in this place before, we will overwrite our encrypted linux partition with zeros. This will reduce the chance of breaking the encryption by increasing the amount of random information. To do this, run:
dd if=/dev/zero of=/dev/mapper/backup2
The utility may take several hours to run, to be able to watch the process, use pv:
pv -tpreb /dev/zero | dd of=/dev/mapper/backup2 bs=128M
When the process is completed, we can format the device to any file system. For example, let's format to ext4:
mkfs.ext4 /dev/mapper/backup2
As you can see, all cryptsetup commands apply to the physical partition, while the rest of the disk commands apply to our virtual one.
Partition Mount
Now you can mount only that created file system:
$ mount /dev/mapper/backup2 /backup2
Disabling a section
Everything works, but how to turn off the device and protect the data. To do this, run:
cryptsetup luksClose backup2
Re-mount
To again be able to work with an encrypted partition using LUKS linux, you need to open it again:
cryptsetup luksOpen /dev/sda6 backup2
Now we can mount:
mount /dev/mapper/backup2 /backup2
Check luks filesystem
Since after opening a partition with luks linux, this partition is treated by the system like all others, you can simply use the fsck utility:
sudo umount /backup2
$ fsck -vy /dev/mapper/backup2
$ mount /dev/mapper/backup2 /backu2
Change luks passphrase
Linux drive encryption is done with a specific passphrase, but you can change it. Even more, you can create up to eight different passphrases. To change, run the following commands. First, let's back up the LUKS headers:
cryptsetup luksDump /dev/sda6
Then let's create a new key:
cryptsetup luksAddKey /dev/sda6
Enter any passphrase:
Enter new passphrase for key slot:
Verify passphrase:
And delete the old one:
cryptsetup luksRemoveKey /dev/sda6
Now you will have to enter the old password again.
conclusions
That's all, now you know how to encrypt a partition in Linux, and also understand how it all works. In addition, disk encryption in Linux using the LUKS algorithm opens up great opportunities for full encryption of the installed system.
Pros:
- LUKS encrypts the entire block device and is therefore very well suited for protecting the contents of portable devices such as mobile phones, removable media or laptop hard drives.
- You can use on NAS servers to protect your backups
- Intel and AMD processors with AES-NI (Advanced Encryption Standard) have a set of commands that can speed up the dm-crypt based encryption process in the Linux kernel since 2.6.32.
- It also works with the swap partition, so your laptop can use the sleep or hibernation function completely safely.
Author: Nitish Tiwari
Publication date: 04 February 2015
Translation: N.Romodanov
Transfer date: March 2015
TrueCrypt is no longer supported, but dm-crypt and LUKS are a great open source option to encrypt and use encrypted data.
Data security has become one of the biggest concerns among internet users. News of data theft from websites has become very common, but protecting your data is not only the responsibility of websites, there is a lot that we, as end users, can do for our own security. For example, just a few examples are using strong passwords, encrypting the hard drives that are located on our computers, and using secure connections. In particular, hard drive encryption is a good way to ensure security - it will not only protect you from any Trojans trying to steal your data over the network, but also from physical attacks.
In May of this year, development of the TrueCrypt application, a well-known open source tool for disk encryption, stopped. As many of you know, it was one of the very reliable tools for encrypting drives. It's sad to see a tool of this caliber disappear, but such is the greatness of the open source world that there are several other open source tools that can help you achieve security with disk encryption, which also have a lot of configuration settings. We will look at two of them - dm-crypt and LUKS - as an alternative to TrueCrypt for the Linux platform. Let's start with a quick look at dm-crypt and then LUKS.
This is basic information about a device using LUKS, which indicates what encryption is used, the encryption mode, the hash algorithm, and other cryptographic data.
Resources
Step 01: Considering Dm-crypt
The name of the application dm-crypt is short for device mapper-crypt (encrypt when mapping a device). As the name suggests, it is based on device mapping, a Linux kernel framework designed to map block devices to higher-level virtual block devices. When mapping devices, you can use several kernel features, such as dm-cache (creates hybrid volumes), dm-verity (designed to check the integrity of blocks, is part of Chrome OS) and also the very popular Docker. For cryptographic purposes, dm-crypt uses the Linux Kernel Crypto API framework.
So, to summarize, the dm-crypt application is a kernel-level encryption subsystem that offers transparent disk encryption: this means that the files are available immediately after the disk is mounted - there is no visible delay for the end user. To encrypt using dm-crypt you can simply specify one of the symmetric ciphers, the cipher mode, the key (any size allowed), the IV generation mode, and then create a new block device in /dev. Now, when writing to this device, encryption will occur, and when read, it will be decrypted. You can mount a filesystem on this device as usual, or you can use the dm-crypt device to create other constructs such as a RAID or LVM volume. The mapping table for dm-crypt is set as follows:
Here, the value of start-sector is typically 0, the value of size is the size of the device in sectors, and the target name is the name you want to give to the encrypted device. The target-mapping table consists of the following sections:
Step 02: Considering LUKS
As we saw in the previous step, the dm-crypt application can encrypt/decrypt data on its own. But it has a few drawbacks - if you use dm-crypt directly, it won't create metadata on disk, and this can be a big problem if you want to ensure compatibility between different Linux distributions. Also, the dm-crypt application does not support the use of multiple keys, while in real life it is very important to use multiple keys.
It is for these reasons that the LUKS (Linux Unified Key Setup) methodology was born. LUKS is the standard for hard disk encryption in Linux, and standardization allows for compatibility across distributions. Multiple keys and passphrases are also supported. As part of this standardization, a LUKS header is added to the encrypted data, and this header contains all the information necessary for configuration. When there is such a header with data, then users can easily switch to any other distribution. The dm-crypt project currently recommends using LUKS as the preferred way to set up disk encryption. Let's look at how to install the cryptsetup utility and how to use it to create LUKS-based volumes.
Step 03: Installation
The kernel-level functionality that dm-crypt uses is already available in all Linux distributions; we only need an interface to them. We will use the cryptsetup utility, which allows you to create volumes using dm-crypt, the LUKS standard, and the good old TrueCrypt application. In order to install cryptsetup on Debian/Ubuntu distributions, you can use the following commands:
$ sudo apt-get update $ sudo apt-get install cryptsetup
The first command synchronizes the rocket index files with the contents of their repositories: it gets information about the latest versions of all available packages. The second command will download and install the cryptsetup package on your computer. If you are using the RHEL/Fedora/CentOS distribution, you can use the yum command to install the cryptsetup utility.
$ yum install cryptsetup-luks
Step 04: Creating a target file
Now that the cryptsetup utility has been successfully installed, we need to create a target file that will hold the LUKS container. Although there are many ways to create such a file, a number of conditions must be met when creating it:
- The file should not consist of several parts located in different places on the disk, i.e., when creating it, you should immediately allocate a sufficient amount of memory for it.
- The entire file must be filled with random data so that no one can tell where the data used in encryption will be located.
In creating a file that will satisfy the above conditions, the dd command can help us, although it will work relatively slowly. Just use it with the special device file /dev/random specified as input and the target file to be specified as output. An example command looks like this:
$ dd if=/dev/random of=/home/nitish/basefile bs=1M count=128
This will create a 128 MB file called basefile in the /home/nitish directory. However, please note that this command may take a long time to complete; in the system that our expert used, it took an hour.
Step 05: Create dm-crypt LUKS
After you have created the target file, you need to create a LUKS section in this file. This section serves as the base layer upon which all data encryption is built. In addition, the header of this section (LUKS header) contains all the information required for compatibility with other devices. To create a LUKS partition, use the cryptsetup command:
$ cryptsetup -y luksFormat /home/nitish/basefile
After you agree that the data inside the basefile will be permanently deleted, enter the passphrase, and then confirm it, the LUKS partition will be created. You can check this with the following file command:
$filebasefile
Please note that the phrase you enter here will be used to decrypt the data. It is very important to memorize it and store it in a safe place, because if you forget it, you will almost certainly lose all the data on the encrypted partition.
Step 06: Create and mount a file system
The LUKS container we created in the previous step is now available as a file. In our example, this is /home/nitish/basefile. The cryptsetup utility allows you to open a LUKS container as an independent device. To do this, first map the container file to the device name and then mount the device. The display command looks like this:
After you successfully enter the passphrase created in the previous step, the LUKS container will be mapped to volume1. What actually happens is that the file is opened as a local loopback device, so that the rest of the system can now treat the file as if it were a real device.
Step 07: File system - continued
The LUKS container file is now available on the system as a regular device. Before we can use it for normal operations, we must format it and create a file system on it. You can use any file system that is supported on your system. In my example, we used ext4 as it is the newest file system for Linux systems.
$ mkfs.ext4 -j /dev/mapper/volume1
Once the device has been successfully formatted, the next step is to mount it. You must first create a mount point, preferably in /mnt (common sense).
$ mkdir /mnt/files
Now we mount:
To cross-check, use the df –h command - you will see the device "/dev/mapper/volume1" at the end of the list of mounted devices. It can be seen that the LUKS header already occupies some space in the device.
Thanks to this step, you can now use a LUKS device with an ext4 file system. Just use this file storage device - everything you write to this device will be encrypted, and everything you read from it will be decrypted and shown to you.
Step 08: Using an encrypted disk
We have followed several steps in order to achieve this result, and if you are not very clear on how it all works, you will most likely be confused about what needs to be done only once (required for installation), and that should be done regularly when using encryption. Let's consider the following scenario: you successfully completed all the steps above and then turned off your computer. The next day, when you start your computer, you are unable to find the mounted device - where did it go? To deal with all this, you need to keep in mind that after starting the system, you need to mount the LUKS container, and unmount it before stopping the computer.
To access the LUKS file, each time you turn on your computer, follow these steps, and then safely close the file before you turn off your computer:
Open the LUKS file (i.e. /home/nitish/basefile) and enter the password. The command looks like this:
$ cryptsetup luksOpen /home/nitish/basefile volume1
Once the file is open, mount it (if it doesn't mount automatically):
$ mount /dev/mapper/volume1 /mnt/files
Now you can use the mounted device as a regular disk and read from or write data to it.
Once done, unmount the device like this:
$ umount /mnt/files
After successfully unmounting, close the LUKS file:
$ cryptsetup luksClose volume1
Step 09: Backup
Most loss of data stored in a LUKS container is due to corruption of the LUKS header or key slots. In addition to the fact that LUKS headers can be corrupted even due to accidental overwriting in header memory, a complete hard disk failure is also possible in real conditions. The best way to protect yourself from such problems is a backup. Let's see what backup options are available.
To back up the LUKS header file, specify the luksHeaderBackup parameter in the command:
$ sudo cryptsetup luksHeaderBackup /home/nitish/basefile --header-backup-file /home/nitish/backupfile
Or, if you want to restore a file from a backup, specify the luksHeaderRestore parameter in the command:
$ sudo cryptsetup luksHeaderRestore /home/nitish/basefile --header-backup-file /home/nitish/backupfile
You can use the isLuks parameter to check for a LUKS header file and verify that the file you are dealing with corresponds to an actual LUKS device.
$ sudo cryptsetup -v isLuks /home/nitish/basefile
We've already seen how to back up LUKS header files, but backing up a LUKS header doesn't really protect against a total disk failure, so you need to back up the entire partition with the following cat command:
$ cat /home/nitish/basefile > basefile.img
Step 10: Various settings
There are a few other settings that can be useful when using dm-crypt LUKS encryption. Let's take a look at them.
To dump the LUKS header, the cryptsetup command has the luksDump option. It will allow you to take a snapshot of the LUKS header file of the device you are using. An example command looks like this:
$ cryptsetup luksDump /home/nitish/basefile
At the beginning of this article, we mentioned that LUKS supports multiple keys. Let's see this in action now by adding a new key slot ( note per.: key slot - turnkey place):
$ cryptsetup luksAddKey --Key-slot 1 /home/nitish/basefile
This command adds a key to key slot number 1, but only after you enter the current password (the key present in key slot 0). There are eight key slots in total, and you can decrypt data using any key. If you dump the header after adding the second key, you will see that the second key slot is occupied.
You can remove key slots like this:
$ cryptsetup luksRemoveKey /home/nitish/basefile
This will remove the key slot with the highest slot number. Be careful not to delete all slots or your data will be permanently lost.
: - Russian
Active page development completed
If there is something to add, then supplement the sections with new information. Our typos and errors in the article can be edited safely, there is no need to report it by mail, please follow the style of this page and use section separators (gray lines of various thicknesses).
Data Encryption in Debian
Many people think that you do not need to encrypt your data. However, in everyday life, we often encounter such situations as “a flash drive was lost” or “a laptop was handed over for repair”, etc. If your data is encrypted, then you don’t have to worry about it at all: no one will publish it on the Internet, or use it in any other way.
Encryption with cryptsetup
Install the necessary components:
# apt-get install cryptsetupStandard Syntax
/dev/sda2. Let's enter the command:
# cryptsetup create sda2_crypt /dev/sda2This command will create an encrypted connection to our disk. In catalog /dev/mapper a new device will appear with the name we requested: /dev/mapper/sda2_crypt, accessing which we use encrypted disk access. In the case of LUKS, the name would be /dev/mapper/sda2_crypt
If there was already a file system on the disk and we would like to save data on it, then we need to encrypt them for their subsequent use:
# dd if=/dev/sda2 of=/dev/mapper/sda2_cryptIf a new disk is created on an empty partition, then you can format it:
# mkfs.ext3 /dev/mapper/sda2_cryptLater, you can mount this disk anywhere:
# mount /dev/mapper/sda2_crypt /path/to/mount/pointCheck data integrity (as usual, best used only in unmounted state):
# fsck.ext3 /dev/mapper/sda2_cryptAnd even decrypt back if we don't want to use encryption anymore:
# dd if=/dev/mapper/sda2_crypt of=/dev/sda2LUKS syntax
The above steps can be done according to the LUKS standard
We initialize the section:
cryptsetup luksFormat /dev/sda2We connect to the system:
cryptsetup luksOpen /dev/sda2 sda2_cryptFormatting:
mkfs.ext4 -v -L DATA /dev/mapper/sda2_cryptWe mount:
mount /dev/mapper/sda2_crypt /mnt/dataThe section can be manually disabled about the system
cryptsetup luksClose sda2_cryptConnection at startup
The file is used for this purpose. crypttab.
For our disk, write the following line into it:
nano /etc/crypttab # name mapper device key params/options # Standard syntax sda2_crypt /dev/sda2 none aes-cbc-plain:sha256 # and/or LUKS standard sda2_crypt /dev/sda2 none luksThe default is to encrypt with a password entered by the user. Thus, every time you boot your computer, the system will ask you every time for a password to connect each encrypted partition. Even if these sections are not registered in fstab.
If we want to mount manually, then add the option auto in the "Settings/Options" field.
Mounting an encrypted partition manually according to data from /etc/crypttab
cryptdisks_start msda2_cryptAnd shutdown with pre-mounted fs.
cryptdisks_stop sda2_cryptTo automatically mount the fs on the connected encrypted partition, add a line to /etc/fstab
/dev/mapper/sda2_crypt /mnt/data ext4 defaults 0 0Working with keys in LUKS
The LUKS section supports 8 different keys, each of which fits into its own slot.
View the list of used keys
cryptsetup luksDump /dev/sda22 types of keys can be used in LUKS - key phrases and files.
You can add a keyword
cryptsetup luksAddKey /dev/sda2You can add a key file (2048 bit) and set access rights to it.
dd if=/dev/urandom of=/root/ext2.key bs=512 count=4 cryptsetup luksAddKey /dev/sda2 /root/ext2.key chmod 400 /root/sda2.key cryptsetup -d /root/sda2.key luksOpen /dev/sda2 sda2_cryptTo connect at startup by key, edit /etc/crypttab
nano /etc/crypttab sda2_crypt /dev/sda2 /root/sda2.key luksYou can remove a passphrase or key from a section
cryptsetup luksKillSlot /dev/sda2 1Emergency mounting in a "foreign" distribution
No one is safe from problems and sometimes you need to access an encrypted partition from a rescue LiveCD.
We boot, connect the partition to the system and mount the fs:
cryptsetup luksOpen /dev/sda2 sda2_crypt mount -t ext4 /dev/mapper/sda2_crypt /mnt/backupAfter work, unmount the fs and disconnect the encrypted partition from the system
umount /mnt/backup cryptsetup luksClose sda2_cryptShutdown Error Messages
If the root partition is encrypted, then a message will be displayed upon shutdown
stopping early crypto disks... failedThis is a technical error. When shutting down, the file systems are always dismantled first, and only then the partition is dismounted. As a result, it turns out that the cryptsetup utility located on the root unmounted partition is no longer available for launch, which INIT tells us about. Without crutches, this problem cannot be solved, because. for this you need to consider options with transferring cryptsetup to a RAM disk
A similar situation occurs when using a software RAID containing a root partition. 8)
Encryption with the loop-aes module
Encryption of a hard drive partition, flash drive with a password
In this howto encryption method described AES256, other methods can be applied similarly (replacing the name of the method with the appropriate one). We will need the following packages:
# apt-get install loop-aes-utils loop-aes-modules-`uname -r`Note: if you are using a kernel for which the required loop-aes-modules is not in the repository, you can install the modules with the following commands:
# apt-get install module-assistant loop-aes-source # module-assistant a-i loop-aesFirst stage
At the initial stage, we prepare the disk to work with it using encryption.
Let's select the partition of the disk (or flash drive) that we want to encrypt, for example it will be /dev/sda2. Let's enter the command:
# losetup -e AES256 -T /dev/loop0 /dev/sda2After executing this command, all calls to the device /dev/loop0 will be encrypted and encrypted and redirected to the device /dev/sda2. Now we have both encrypted and unencrypted channels to the storage device. The data is encrypted using the password you specified when executing losetup.
Now we can, for example, format the device:
# mkfs.ext3 /dev/loop0We can mount it:
# mount /dev/loop0 /path/to/mountwe can disable encryption:
# losetup -d /dev/loop0and most importantly, we can encrypt the partition without data loss:
# dd if=/dev/sda2 of=/dev/loop0and also decrypt if we decide that encryption is not our method:
# dd if=/dev/loop0 of=/dev/sda2Well, the best part is, we can do file system integrity checks:
# fsck.ext3 /dev/loop0This feature is not available in all partition encryption methods.
Everyday use
If you already had a section entry /dev/sda2 in your /etc/fstab, then you just need to add options, and if not, then write something like this:
/dev/sda2 /path/to/mount ext3 loop,encryption=AES256 0 0Now, when you boot the operating system, you will be prompted for a password to mount.
If you do not want the download process to be interrupted by a password request, then you can add options auto,user on record /etc/fstab:
/dev/sda2 /path/to/mount ext3 loop,encryption=AES256,noauto,user 0 0Of course, you can mount manually (or from a script):
# mount /dev/sda2 /path/to/mount -o loop,encryption=AES256Mounting multiple file systems
Sometimes you want to encrypt several sections with data at the same time, but so as not to enter a sea of passwords for each mount. For example, you have a flash drive that you carry from home to work, a portable hard drive, etc. Or just a few partitions / hard drives.
Let's say we have an encrypted partition /dev/sda2, which we mount to the directory every time we boot /mnt1. A new hard drive has arrived /dev/sdb1 and we want it to be automatically mounted to the directory mnt2 when mounting the first one. Of course, you can create a general system on something like LVM, but you can go the simpler way:
prescribe in fstab like the following line:
/dev/sda2 /mnt1 ext3 noatime,exec,loop,encryption=AES256 0 0The system, on boot, mounts the points in the same order as described in fstab, so if the first partition is not mounted, then the key to mount the second partition will remain unavailable and the second partition will also not be mounted.
The password is stored as plain/text this is certainly not very beautiful, but it is stored on an encrypted partition (which can be unmounted). You can use instead gpg-key, however, this will not add much security (if they can already steal the key, then it will not make much difference what this key will be), encryption option with gpg-key described in man losetup, here I will only give an example of recording in fstab:
/dev/sda2 /mnt1 ext3 noatime,exec,loop,encryption=AES256 0 0Notes
For more information on supported encryption algorithms, see man losetup, you can also see a description of other program options losetup.
If you have problems installing AES modules, then read the documentation that comes with the package loop-aes-source.
GRUB and encrypted root disk
When installing a root partition on an encrypted disk, GRUB may show bugs in the main menu. This happens because the standard font /usr/share/grub/unicode.pf2 is not available. Copying the Font
cp /usr/share/grub/unicode.pf2 /boot/grub/Specify the setting
nano /etc/default/grub GRUB_FONT=/boot/grub/unicode.pf2Applying the setting:
update-grubI don't understand Canonical. It seems that on August 23 we passed the freezing of new features of FeatureFreeze, and on August 30 the freezing of the appearance of UserInterfaceFreeze was passed. What do we actually see? In the installer Ubiquity introduces the ability to encrypt the entire system and in Unity Greeter adds network indicator and network login capability.
Encryption of the entire Ubuntu during the installation phase.
As you can see, Canonical has implemented disk encryption in the Ubiquity graphical installer to improve the security of Ubuntu 12.10 Quantal Quetzal. This functionality was previously only available in Alternate CD, but as you know, Canonical plans to stop using alternative discs.
If you select the "Encrypt the new Ubuntu installation for security" option, you will be prompted to enter the encryption keys in the next step.

Also, for added security, there is an option to overwrite empty disk space, but this will make the installation process a bit longer.
Remember that any files outside of the Ubuntu installation are not encrypted! In the future, new disks and new partitions will not be encrypted by default, and you must remember this.
And do not confuse encryption of all Ubuntu partitions with encryption of the Home folder!

Unity Greeter network and welcome screen.
Unity Greeter has had minor cosmetic changes. The welcome window has become wider and closer to the center. Rounded corners make the overall look visually softer. The font that displays the username has been slightly reduced. Keeping the overall style, the password entry field was highlighted in a subtle orange color. The list of sessions available to you has changed, instead of a "simple list" there are now "buttons".
Along with the above changes, the developers have added a network indicator.

Therefore, when logging in, you can easily disable network connections or view the current network status to be sure that network logging is possible.
Based on the official changelogs, Unity Greeter is preparing to implement network login capability in the near future.
The magic lamp is now enabled by default.

The window repair effect known as Genie or Magic Lamp has been available in Compiz before, but will be enabled by default in Ubuntu 12.10.