You can easily connect your phone, tablet or other device to the high-speed Internet connected to your home through a Wi-Fi router (router). However, such a device is not always at hand (for example, you went to the country house, taking with you a laptop and a wireless USB modem). In such cases, you can use the Internet on a mobile gadget through a laptop, entrusting it with the functions of a router. Let's look at how to make a laptop a Wifi access point.
Ways to create a wireless access point
Any modern laptop is equipped with a wireless adapter that can be used as a Wi-Fi router. To do this, you need to create a kind of virtual bridge that connects network equipment (Wi-Fi adapter and network card).
To get this kind of routing, you can use the following tools:
- standard tools of Windows OS (graphical application "Network Control Center ...", command line or bat-file);
- additional software.
Whichever method is chosen, you need to ensure compliance with the following conditions:
Creating a wireless access point using the Windows menu
The easiest way to create a virtual router is to use the "Network Control Center ..." function built into the OS. This requires:

After the virtual router is created, in order to successfully use the Internet through it, you may additionally need to enable public access. This is done as follows:

After all the steps have been completed, turn on the Wi-Fi on the mobile gadget and start the search for available networks. In the drop-down list, select the name of the network that was specified when creating the virtual Wi-Fi router, and specify the specified key.
Creating Wi-Fi access via the command line
You can also use the command line to connect your phone to the Internet via a laptop, that is, using a virtual router. This procedure may seem complicated to an inexperienced user, however, following the instructions exactly, you will be able to turn on the wi-fi point in just a few minutes.
To start distributing wifi from laptop to phone, you need:

To distribute the Internet via a laptop to a phone or other device, you need to enable shared access to the newly created Wi-Fi point. To do this, go to the "Network Connections" section and call the properties of the network through which the Internet is connected to the laptop. After that, in the "Advanced" tab, put a "bird" in front of the corresponding item, and in the drop-down list, select the name of the created virtual router. 
Using a bat file
Creating a Wi-Fi access point via the command line is inconvenient because every time you turn off the PC, you need to re-write all the commands. Therefore, this method of turning a laptop into a router can only be used for a one-time Internet connection to the phone.
The execution of the above commands can be fully automated... To do this, you need to write a small script in a standard Windows text editor, and then save the document on the laptop desktop under any name in the .bat format. To start distributing Wi-Fi using a virtual router to your phone, you just need to run this document with administrator rights. An example script is shown in the figure, where YourSSID and YourPassword are the name of the wireless connection and the access key to it. 
Creation of a virtual router through additional software
If none of the above methods helped to activate the distribution of the Internet on the phone, you can try to create a virtual Wi-Fi router using special software. There are a lot of such utilities on the network, but among them the most convenient are:
- MyPublicWiFi;
- Connectify.
Sharing Wi-Fi with MyPublicWiFi
This application is absolutely free and has a user-friendly interface, albeit in a foreign language. With it, you can make a Wi-Fi access point with just a few clicks:

Creating a Wi-Fi hotspot via Connectify
The MyPublicWiFi utility may experience problems if the Internet to the laptop is connected not via a cable, but via a USB modem. In this case, it is better to use the Connectify app. There is a paid and free version of this program. For periodic use, the second option is sufficient. To enable the distribution of Wi-Fi from PC to phone using Connectify, you must:

Possible difficulties when creating a Wi-Fi hotspot
When creating a new Wi-Fi access point, users often encounter minor difficulties. The table shows the most common problems that can prevent the distribution of the Internet from a laptop, and possible solutions.
| The essence of the problem | The reason behind this | Possible Solution |
| The phone cannot track the Wi-Fi network even though it is running | Blocking a connection with an installed antivirus or firewall | Temporarily disable your firewall or antivirus software |
| The Internet does not work on the phone, although the Wi-Fi is connected | User forgot to enable sharing during setup | Log in to "Network and Sharing Center" and enable sharing |
| The connection is blocked by a firewall or antivirus | Disable online protection temporarily | |
| The message "Failed to start the network" pops up | The wireless adapter is disabled on the laptop | Turn on Wi-Fi in laptop settings |
| Drivers for the adapter are not working correctly | Update drivers using the disc that came with your PC or the Internet |
In the civilized world, the popularity of the World Wide Web is only increasing every year. If earlier only young people used the Internet, now the older generation has mastered the benefits of civilization. Today, almost every home has the Internet connected to a computer or laptop. But, alas, not everyone has a Wi-Fi router that would make it possible to connect all the gadgets in the house to the World Wide Web. There is a way out of this situation, in today's article we will show you how to distribute Wi-Fi from a laptop to Windows 7, 10. All methods of distribution from a PC to Windows 7, 8, 10 will be found in one article.
Checking on a laptop, the possibility of distributing Wi-Fi
In order to be able to distribute the Internet from a laptop via wireless Wi-Fi, there are mandatory requirements: the adapter must be compatible with a PC with virtual Wi-Fi. It will not be difficult to check this, it will be enough to run the command line on your laptop and insert a specific command there. Now we will show how to do this:
- We go " Start", are looking for " Search"And drive in there" cmd". You immediately jump out " command line».
- We prescribe without errors " netsh wlan show drivers", Click" Enter».
- In this window we find the line “ Hosted network support"If next to this line you see" Yes”, This means that you can start setting up your computer with confidence.
If it says “ No"Then it is worth trying to update the driver for the Wi-Fi module. Or sometimes it helps to rollback the driver to the version that was earlier. Do it with this overview:
- Entering " Network connections", Click RMB" Wireless network», « Properties», « Tune».
- In the top row, click the section “ Driver"And press the button" Roll back driver ...».
How to distribute Wi-Fi from a laptop under Windows 7, all methods
Now let's look at the three most common ways. By applying one of them, you can organize the distribution of WiFi from your laptop. See below for a detailed description.
Option # 1: create a PC-PC network
- To implement the first option, right-click on the icon " Network". It is located in the lower right corner, near the date and time. We select the second line from the top " Network Control Center….».
- A new window will pop up, now in it we click on the line “ Setting up a new connection ...», « Setting up a wireless network ...».
- Next, enter the parameters of the future Wi-Fi network. Network name - enter any name. Security type - can be supplied " WPA2 - Personal". Security key - we drive in the password and remember it, you will need it when connecting to your laptop. Do not forget to tick at the very bottom “ Save all parameters". We press " Further". Another window will appear where you need to click on the item " Enable sharing to….».
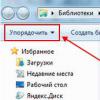
- Re-enter " Network Control Center ...", On the left side, click" Change advanced parameters….". Here we put dots everywhere “ Turn on».
Ready. We have detailed the first option, thanks to which you will be able to distribute wifi from a laptop in Windows 7
Option # 2: Create a Wi-Fi Sharing on a Laptop Using the Command Line
This method is considered by many to be more reliable and easily customizable. Therefore, to find out how you can distribute wifi on Windows 7 thanks to the command line, look carefully further in the article and do everything the same way.
Attention! This option can be used provided that the driver of your module is compatible with the function “ Virtual Router". It's good that almost all Windows 7 computers support this feature. The only possible obstacle that may arise is an outdated driver. Therefore, we recommend that you update it to the latest version.
- To open the command line, simultaneously hold down the " Win and R". A small window will appear, drive in there " cmd", Click" Enter».
- In the command line that appears, type in “ netsh wlan set hostednetwork mode = allow ssid =Home wi-fikey =13131313 keyUsage = persistent". Remember to change with this command: First instead of " Home wi-fi»Type in your name for the Wi-Fi network. Second, change " 13131313 », Enter the password you have invented here. Click " Enter».
- We check the task manager, a new module should be created in it " Virtual mini port adapter….».
- After making sure that the new module has appeared, we proceed to its settings. We go " Network Control Center….", From the left side " Changes to adapter parameters". You should see another adapter " Wireless network connection - 2».
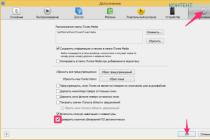
- We click on the new PCM adapter and select " Properties". Go to the item " Access". Here we place checkboxes everywhere, select a new module. Press the key " OK". See the picture below.
- Further in the section “ Change advanced parameters ..."Put a full stop" Enable network discovery". Optionally, you can activate the ability to provide access to your files and devices.
- The last action to be taken is to activate the made Wi-Fi network. Re-call the command line and insert there " netsh wlan start hostednetwork", Then click" Enter". That's all, you can try to connect. On Windows 8, distribute wifi like this will work out too.
Keep in mind: after any reboot of the laptop, the distribution will be disabled, so you need to re-perform the last item to enable it.
Option # 3: turn on WiFi sharing on your laptop using various applications
Well, let's look at the last method, how to distribute wifi from a computer to Windows 7 using various programs.
You can find a lot of such utilities on the vastness of the world wide web. Their setup principle is very similar. Therefore, we can highlight some of them that are free and easy to customize.
- MyPublicWiFi- good application, simple interface, spend a little time setting up. Be sure to restart your PC after installation.
- Connectify Hotspot Is a popular utility. There is a version in Russian, so there should be no problems with the setting.
- mHotSpot- user-friendly interface and easy setup for distribution. To use this program, you need the world wide network to be connected to the computer with a cable. Since mHotSpot cannot simultaneously receive the Internet and immediately distribute it via wifi.
This is perhaps all, three options for how to distribute the Internet easily via wifi from a laptop to Windows 7, we showed. The choice is yours. Read this post if you don't know.
Implementation on Windows 10 distribution of Wi-Fi, from any laptop
Distributing wifi from a laptop in Windows 10 is slightly different from other OS versions, it has been slightly simplified with an additional function. We will now show all available methods.
We check the technical ability to distribute Wi-Fi on the computer
This action is performed in the same way as we wrote at the very beginning of the article. Having resorted to the command " netsh wlan show drivers", Which you want to drive into the command line. Therefore, it makes no sense to repeat the same thing. See above.
Method # 1: We use a mobile hot spot in the Windows 10 system
This is probably the fastest method on how to distribute Wi-Fi from a laptop to Windows 10. The function " Mobile hot spot"Is available in all the latest versions on Windows 10. It is very easy to configure:
- Left-click on the icon " Network", You can find it near the time. We choose " Network parameters».
- In the pop-up window on the left side at the bottom, click " Mobile hot spot". Then start it by dragging the slider to the " On". A little below click the button " Change"So that you can write" Network name, Network password, Network range". After entering, click " Save».
What to do if there is no "Mobile hotspot" in Windows 10
You may have an older version of Windows 10 installed on your PC, so the feature is missing. Or you have installed an incomplete version of the OS, such on the Internet shaft. Options for getting out of this situation:
- Try updating. Log in to " Options», « Updates and security», « Checking for Updates».
- Install the latest version of the Windows 10 operating system.
Method # 2: Create Wi-Fi Sharing from Laptop Using Command Prompt
This distribution method is no different from the option # 2 for Windows 7. So, if your PC has Windows 10 and you want to use the command line to start the distribution, then just look above in today's article " Option # 2"And do the same.
Before you start configuring the distribution of the Internet from a laptop / computer, you need to make sure that the Wi-Fi adapter is turned on. On most laptops, the WLAN adapter activity indicator is present on the chassis, otherwise you should enable the adapter in the Network and Sharing Center.
Set up the distribution of the Internet using a wireless Wi-Fi network on a computer / laptop.
One of the ways to organize the distribution of the Internet via Wi-Fi is to create a Wi-Fi network computer-computer using Windows (do not rush to do it !!!). I will immediately explain this method has a small drawback, the fact is that you will not connect an Android tablet or an IPhone smartphone to such a network, only another computer / laptop with the Windows operating system installed. This is due to the fact that you create a point in Ad-hoc mode (also called: point-to-point, computer-to-computer, peer-to-peer network) and devices with a different operating system (Android, iOS) will not see your network or will not be able to connect to it. You need Soft AP mode (also called: access point mode, soft Access Point, virtual WiFi, virtual router), how to do this is written in the second part of the article.
The first step is to get to the Network and Sharing Center. To do this, you can right click on network icon in the lower right corner of the screen and select "Network and Sharing Center."
Another way is to go to "Start" - "Control Panel" - "Network and Sharing Center".

It doesn't matter which method you used, in the end you will see the Network and Sharing Center window. Click "Set up a new connection or network".

In the Set up a connection or network window, select "Configure a computer-to-computer wireless network" and click "Next".

You read the information window and click "Next".

In the next window, you must enter the data for the created network:
Network name- the name of the Wi-Fi network (SSID), which will be seen by other computers / laptops. Enter any name.
Security key- password for connecting to a Wi-Fi network, I recommend using a complex password of at least 8 characters, consisting of letters, numbers and special characters ( [email protected]#$).

In the next window, click the "Turn on Internet Connection Sharing" button and click the "Close" button.

This completes the computer-to-computer Wi-Fi network setup. Now if you go to the Network and Sharing Center, you will see your Wi-Fi network.

On other computers, you can see and connect to the created network.

In order to remove the computer-to-computer connection, go to the Network and Sharing Center, select "Manage wireless networks" and delete the created network.

Configure the distribution of the Internet on a laptop for a computer / laptop / tablet / smartphone.
If you want to distribute the Internet not only to computers and laptops, but also tablets and smartphones, the method described below will suit you.
Run the command line with administrator rights, for this click "Start" - "All programs" - "Accessories", right-click on "Command line" and select "Run as administrator".

Another way is to press keyboard shortcut
In the command line, you must run the command:
netsh WLAN set hostednetwork mode = allow ssid = "point name" key = "password"
For example:
netsh WLAN set hostednetwork mode = allow ssid = site key = Pa $$ w0rd

After that, you need to turn on the network, for this run the command:
netsh WLAN start hostednetwork

The next step is to provide Internet access to all connected devices, for this go to the Network and Sharing Center and select "Change adapter settings". In the connections window that opens, select the connection that has Internet access (it does not matter what is the Internet Source - 3G / 4G modem, provider cable or Wi-Fi network with access to the global network), for this you can change the view to "Table" and see next to the connection "Access to the Internet". In my case, this is "Local Area Connection 2". The orange line marks the network that we created, the line Microsoft Virtual WiFiMiniport Adapter will tell you about it (remember the name of the network, it will come in handy later).

Click on the connection with the right mouse button and select "Properties".

In the properties window, select the "Access" tab, check the box next to "Allow other network users to use this computer's Internet connection", below select the connection that you created, in my case it is Wireless Network Connection 2 (the connection marked with the orange line in the picture above).

This completes the Wi-Fi network setup. It should be noted that after restarting the computer that distributes the Internet, you will have to run the command again, since it will not work automatically. . If you want it to start automatically every time you boot your computer, you need to create a batch file and add it to startup. To do this, create a text document, enter the command netsh WLAN start hostednetwork, save the document. Further change the extension from txt to bat and add the file to startup (Start - all programs - startup).
In order to remove the Wi-Fi connection, run the command line with administrator rights and use the command:
netsh WLAN set hostednetwork mode = disallow ssid = "point name" key = "password"
For example:
netsh WLAN set hostednetwork mode = disallow ssid = site key = Pa $$ w0rd

That's all. If you have any questions or wishes, write in the comments.
As you know, the "classic" way to create a wireless access point is to connect additional network equipment - a router, which will be a kind of link between all the nodes of the local network.
By the way, the hardware method of creating a WiFi zone is the only correct solution when setting up a more or less serious local network: it provides a stable long-term connection of any mobile devices, and also supports many additional functions.
And in this article we will analyze how to make a laptop distribute Wi-Fi without a router, and what Windows 7 setup is required to connect to the Internet.
As a rule, the need to distribute wifi from a laptop arises when connecting to the world wide network via a USB modem or working with wireless peripherals (etc.).
However, not every modern laptop is capable of such a network feat: this function directly depends on the capabilities of your PC's network card.
Finding out if a laptop can distribute wifi without a router is easiest using the "Command Line". To do this, go to "Start" -> "Run" -> "cmd", in the window that opens, enter the command netsh wlan show drivers and press the "Enter" key (for Windows XP / Windows 7).
If the system gives you the message "The autotuning service is not running", then on this PC there is no module necessary for wifi connection.
If the command "passes" without errors, then find the line "Hosted Network", which characterizes the ability of your laptop to distribute wifi.

If "Yes" is indicated here - you can safely proceed with further configuration of your laptop;
Otherwise, update the driver of the network card to the most recent version (it is recommended to download the software only on the official website of the manufacturer) and re-check the capabilities of the network adapter via the command line. If the result remains unsatisfactory, then you will not be able to distribute the Internet from a laptop.
How to make a laptop distribute Wi-Fi?
If everything is in order with the adapter, and the hardware capabilities of this PC allow you to create a wireless access point based on a computer, then you can force the laptop to distribute wifi in three different ways:
- - through the "Network and Sharing Center";
- - using the command line;
- - using special software (through the Connectify program, etc.)
In this article, we will look at how to distribute wifi from a laptop without programs, i.e. by manually configuring windows 7.
How to distribute wired Internet from a laptop to another computer?
The easiest way to make a laptop distribute Wi-Fi is to create a new network through the "Control Center" on windows 7 OS.
This method allows you to distribute wifi from the laptop only to other computers running on Windows. In other words, a simple peer-to-peer network is created (the so-called ad-hoc mode), and you will not be able to "share" the Internet on an android using it.
So, to distribute wifi without a router via a laptop:
1. Go through the "Start" menu -> "Control Panel" -> "Network and Internet" in the subsection "Network and Sharing Center".
2. Select "Configure a new connection or network" in the main window.
3. In the window that opens, select "Configure the wireless network computer-computer", click "Next" and again "Next" (in the information section).


4. In the next window, enter the settings for the new local network:
- - Network name (SSID) - the name of the wifi access point, which will be reflected in the "search for available connections" of other computers;
- - Security type - choose "standard option" WPA2-Personal;
- - Security key - a unique password for connecting to the local network.
5. In the new window, click "Turn on Internet Connection Sharing" and close the Wireless Setup Wizard.
Now the laptop is able to distribute the Internet and exchange information with other computers. To connect to wifi on a third-party PC, just go to the "Network Control Center", select the desired access point by SSID and enter the installed authentication data.
Unfortunately, this is far from a universal method, since in most cases it is required to distribute Wi-Fi from a laptop to various android devices (in order to save mobile traffic) or connect to peripheral functional nodes (network printer, etc.).
How to distribute Wi-Fi via laptop to Android?
In addition to the above method, you can distribute wifi from a laptop using the command line. The advantage of such a connection is that you can distribute the Internet without being tied to the operating system of the receiving device: to a tablet, phone, etc.
However, when the laptop restarts (or "falls asleep"), such an access point stops working, and for the network to work, either regularly maintain the PC in working mode, or after rebooting, re-carry out all the steps of setting up the local network.
So, in order for a laptop with Windows OS to distribute wi-fi, you need:
Through "Start" -> "All programs" -> "Accessories" go to the command line in administrator mode.
Write the command here:
netsh WLAN set hostednetwork mode = allow ssid = "your network name" key = "password"
(for example netsh WLAN set hostednetwork mode = allow ssid = "setka" key = "horowiikluch")
to create a new wireless access point.
Enable the created network using the command: netsh wlan start hostednetwork

(If this operation is successful, a system message will appear: "Hosted network started")
Grant all devices on the network the right to access the Internet. To do this, go to "Control Panel" -> "Network and Internet" -> "Network Control Center" -> "Change adapter settings", single-click the right mouse button on the shortcut of the active Internet connection and select the "Properties" menu item.

In the window that opens:
Go to the "Access" tab;
Set the marker opposite "Allow other network users to use the Internet connection";
Select the new connection you created in the "Home network connection" column;
After completing this instruction on all computers in the wifi range of your laptop, when "Searching for available wireless connections", a new access point will appear with the SSID you specified.
In order for the laptop to automatically distribute wi-fi over this local network after rebooting, you can make the command line autoload. To do this, save the netsh wlan start hostednetwork command in a text document, change the file extension to .bat and copy it to the Windows7 (Windows8) startup folder.
Often, users have a need to provide several gadgets with a worldwide network. However, the purchase of special equipment will require certain funds. But there are other ways as well. In this article, we will tell the readers of our blog how to distribute WiFi from a laptop to Android tablets or smartphones.
There are several ways to distribute the Internet from a laptop to Android devices, which we will now talk about.
In order to provide wifi distribution from a Windows laptop to Android (or any other device), several conditions must be met, and they are mandatory regardless of which method you prefer.
- The laptop must be equipped with a Wi-Fi adapter (in the case of a stationary computer, you will probably need an external receiver connected to the USB / PCI slot).
- The Wi-Fi adapter must have a driver that supports Virtual WiFi. If the virtual network does not start, you will need to update the Wireless adapter to the latest current version.
- The laptop must be connected to the Internet, which will be active.
Using Windows 7 tools
This option is quite simple and does not require additional software to be installed. However, you need to take into account that the tools with which you can distribute wi-fi are possessed by an OS with a version of at least Professional.
So what should we do:
On your laptop, in the lower left corner of the screen, click "Start" and go to the Control Panel:

Now select "Network and Sharing Center":

* If sorting is set by categories on your PC, select the "Network and Internet" item.
Here we have to click on the line "Setting up a new connection or network":

From the list of connection options that opens, select "Computer-computer" and click the "Next" button:

Now we enter the network name (optionally), create a password and put a tick in the "Save the parameters of this network" line so as not to enter the password every time you connect:

That's all, now you can distribute the Internet from your laptop (or computer) by connecting an Android device.
Using the command line
First you need to check if it is possible in principle to distribute from your PC. To do this, on a laptop, press the button " Start"And enter in the search bar" cmd»:

After the system finds the program, open it, this will be the command line:

Now we need to enter the command " netsh wlan show drivers"(Without quotes). After that, information will open in which we find the line Hosted network opposite it should be written “ Yes"(For settings in Russian:" Hosted network support»: « Yes»):

So, if our laptop supports distribution, then we return to the command line and enter the settings for the network distributed by the device: netsh wlan set hostednetwork mode=allow ssid=» MyWIFI"Key =" 12345678 ". Where ssid- the name of the network, it is set arbitrarily (in the screenshot MyWIFI), a key- password, we also specify arbitrarily (in the screenshot “ 12345678 «):


Now it remains to configure our newly created network. To do this, follow the path described above: "Start" - "Control Panel" - "Network Control Center", on the left side of the window we find "Change adapter settings", open, find your network, right-click on it, in the drop-down window activate "Properties":

In a new window on the top panel, click the "Access" tab and, by checking the box, give permission to other users to use the Internet connection from their PC. In the field below, select your network and click "OK":

Now we can connect our Android device via Wi-Fi to the Internet, which is distributed by a laptop.
Possible problems:
- The smartphone does not connect to the created network
Most likely, a firewall, antivirus, or other similar program is blocking the connection. Disable them, and if everything started working, then you need to add your connection to the antivirus exceptions.
- Gadgets are connected, Wi Fi is active, but the Internet does not work.
Perhaps in the settings the general access to the Internet was not allowed. You need to make sure that the Internet is working on the distributing laptop, check the settings for permission to share, restart the PC and start the network again.
Starting the network after restarting the computer
This does not require entering the network or password, just enter the following command - netsh wlan start hostednetwork
How to open an access point on a smartphone
So, if one of the methods described above gave a positive result, we just need to provide access to Wi-Fi on the Android device. This is done quite simply:

* Items on your device may have a different name, for example: “ Settings» — « Yet» — « Modem mode» — « Wi-Fi hotspot».
Distributing wifi from a laptop using third-party software
If none of the described options suits you, then you can easily and simply get what you want by installing one of the applications. I will talk about the Connectify program, with which you can easily distribute the Internet.
You can download Connectify from the developer's official website, where you can learn more about the functionality and capabilities of the program.
I, briefly presenting the program, will say that this is a tool that programmatically provides the distribution of the Internet without the help of a router (router), while appointing a Wi-Fi adapter built into the motherboard as a distributing device.
The application is distributed on a paid and free basis. The free version provides the use of the WiFi sharing function. After downloading Connectify, we will need to agree to the license agreement. Then, after waiting for the installation to complete, we reboot the system (button Reboot now).
After restarting, the corresponding icon will appear on the desktop, open the program, go to the section “ Settings" (settings). Here we are interested in three points, in which we need to enter the following data:
- « Hotspot Name"- the name of the network, in the free version the one you see in the screenshot is available.
- « Password»- a password containing at least eight characters.
- « Internet to Share"- here, by clicking the button, we select an active connection from the drop-down list, which we will use
That's all the settings, it remains to press the button " Start Hotspot"And start the distribution process. We will see that the WiFi sign has turned blue, and in “ Disconnected Clients»The changed state of the access point and the type of encryption will appear.
You can connect your Android smartphone to the created network (activate the hotspot and enter the password), and if everything went well, a message about connecting a new device will appear below:

If you still have questions on how to distribute Internet to Android from a laptop, write to us, and we will be happy to answer them. And I have nothing more to add. Good luck!