Greetings on any holiday with a postcard has always been considered a manifestation of respect and attention to loved ones, friends and just acquaintances. And if earlier postal services were needed to deliver such cards, today there are electronic cards with which you can congratulate your loved ones quickly and in a timely manner. Moreover, such a congratulation cannot be lost anywhere, and will come just in time, and the process of creating an electronic message can be quite interesting.
How to make an e-card on a computer
Creating postcards in electronic form is not a difficult process and is carried out as follows:
- in the Internet search engine, a request is entered for a site that creates and sends electronic postcards (for example: postcard.ru or mail.ru);
- with the help of special servers, a postcard is created to your liking, which you can decorate with different patterns, as well as choose the most attractive template, choose a color scheme with a beautiful font for the greeting text;
- if desired, electronic cards can be supplemented with musical accompaniment, it can be selected from the music catalog to the taste of the recipient;
- to create the most interesting thematic plot, you can use a graphic editor, but the idea of \u200b\u200bcongratulations must be thought out in advance;
- the finished postcard is placed in an interactive letter and then sent to its destination.
In order for the creation of postcards in electronic form not to cause difficulties, and also to have a beautiful appearance, it is important to consider the following points:
- it is best to use a graphic editor if you have certain knowledge and skills in working with this program, since studying it can take a lot of time;
- creating postcards using a ready-made template will be much easier and faster, and you can adjust it according to your taste;
- it is best to make postcards that are neutral in content, which will please not only their creator, but also those for whom they are intended;
- when creating postcards, the main thing is to know the measure and not to overdo it with the number of pictures, the amount of text, and also to withstand a certain color scheme.
But in any case, no matter what kind of electronic cards you end up with, they will be a wonderful congratulation on the holiday of your loved ones, because it is beautiful, spectacular and unusual.
How to make a postcard in Word
You can make a postcard in Word, but here I want to note why it is better not to do this.
Word is a text editor, so there are some difficulties with graphic objects when they are arranged. And the result can be seen only by opening the postcard in. And if your recipient does not have this program, then he will not be able to see the postcard, or it will open in a distorted form in another word processor. The expected pleasant impression will be spoiled.
But what to do? We will use the program for creating presentations - PowerPoint. A postcard created in PowerPoint can be saved as a picture and will be available for viewing on any computer and on the Internet.
How to make a postcard in PowerPoint
Creating a postcard takes just a few steps:

1 Open the PowerPoint Presentation Program
First option
- Start - All Programs - Microsoft Office - Microsoft PowerPoint 2010 (you may have a different version, but it doesn't matter - all actions are universal)
Second option
- There is a search in the start menu. Start typing the name of the Microsoft PowerPoint program there and if it is installed on your computer, you will see it in the search results.
2 Choose a layout
Since we are using a presentation program, there will be markup on the original slide. We don't need her. We remove.
Home - Layout - Blank Slide

3 Set the background image
As a background for our postcard, let's take some beautiful drawing. Go to tab Design - Background Styles - Background Format

In the settings window on the tab fill choose Pattern or texture
In section Paste from: press the button File and select the desired image from the folder. Clicking the button Insert and press the button close in the window Background Format.
The selected image will be stretched to fit the slide. The background is ready.
Now you can do a little magic on our postcard to give it an even more original look. To do this, add a few additional elements to the slide: Santa Claus, the text of his congratulations and the title of our postcard. Well, to make it clear that the congratulations are from Santa Claus, let's make a callout for the text.
4 Add decorations and text
Let's get started. Insert a picture with Santa Claus.
Execute the command Insert - Drawing and move it to the bottom left corner. Let's scale it down a bit.

Making a callout Insert - Shapes. Change the shape to the desired size.
Now you can add the text of congratulations with the command Insert - WordArt. Select the text font sample and replace it with our congratulations. We adjust the size of the frame with the text to the size of the callout.
In the same way we make the title of the postcard.
Well, here's the card. It remains only to save it as a picture and you can send it by e-mail.
5 Save the postcard
To save, select the command File - Save As... We give a name to the postcard and, most importantly, change the file type to Drawing in JPEG format

Choose Only the current slide.
Now let's save the presentation so that we can use it to create other postcards.

Video instruction for creating a postcard
Now watch these steps in the video below. From it you will learn: how to insert a picture, change its size, how to add text with congratulations.
Dear friends! Create beautiful original postcards and delight your loved ones and friends with them. I did a selection of blanks for New Year's cards. There are collected: Backgrounds, Santa Clauses, Snowmen, Christmas Trees, Decorations, Symbols of the year and text greetings. And here a selection of blanks for February 23. Still small a selection of blanks for March 8. Download and practice creating e-cards

Another selection of New Year images with transparent backgrounds to quickly create original postcards. Download archive 28 images
By the way, the Microsoft Office package contains a wonderful Publisher program, it can also make a beautiful congratulation in the form of a postcard, I already wrote on the blog in it.
How to search for pictures for a postcard?
To make it as easy as possible for yourself to create a postcard, look for pictures with transparent backgrounds. Such drawings are most often in png or gif file format. It is preferable to use the first format. Gradients (smooth color transitions) are well preserved in it.
To search, go to Yandex. Select a search section Images(block 1). Enter a keyword - what image are you looking for. For example, the year of the pig pictures are New Year's. In the search hints, you can choose the most suitable query.
 Image search in Yandex
 Filters can be used in the found pictures. Click Show filters (box 2). An additional panel will open. Now we select the options for selecting images.
We select drawings by size. For an e-card, we do not need large sizes. Therefore, I advise you to put Medium or small. On the thumbnails of the pictures you will see their true size.
 Filtering the image size
 What size is preferred? On average, most monitors are 1366x768. So try not to take pictures of a larger size. Because when pasted on a slide, it can close it entirely.
Choose your orientation. Everything is clear here. But in Type Do not choose a white background. It's easy enough to remove.
 Background filtering
 But still it is better to choose a picture without a background. To do this, in the filter File select PNG.
 Filter by file type
 Yandex will show pictures according to our selection criteria. On the thumbnails, all pictures will have a white background, but this is not the case. Click on any of them for a larger view. Now, if on the background instead of white you see cells (checkerboard), then this picture has a transparent background.
 Displaying a picture with a transparent background in the search engine
 It is preferable to use it for your greeting card collage. Click on it with the right mouse button, select a command Copy Image and paste it on the slide.
You can do the same with other search engines.
Create an animated postcard
The way to create a static postcard was described above, but you always want something more. Let's try to revive it a little and add falling snow. To create an animated picture, we need to work a little more and make several slides that differ in the position of the snowflakes on the slides. With a quick change of such slides, the effect of falling snow will be observed.
To save such an effect in a picture, you will need another file format - GIF, which is able to store and display animation in the browser. But Power Point does not support animation when saving to this format. Therefore, in the presentation editor, we will make blank frames, and to create animation from them, we will use the online service. Watch the video tutorial below.
I hope this information is useful to you. I congratulate everyone on the future and past holidays!
Friends, if this article was useful to you, share it on social networks, the buttons below. And also tell us in the comments if you managed to make a postcard?
Dear reader! You have read the article to the end.
Did you get an answer to your question? Write a few words in the comments.
If no answer is found, indicate what you are looking for.
Nowadays, almost every user can easily create a greeting card or an advertising brochure using popular programs and online services. In this guide, we will try to consider the current methods for creating electronic cards.
Method 1. Online Services
The fastest and best way to create virtual postcards is design services. For example, Canva and Pro100Tak are great for this purpose.
Canva
This is a foreign resource that allows you to create booklets, posters, business cards, flyers, brochures, covers for music albums and much more. Here are both free and paid postcard templates.
Go to and create an account using email or social networks:
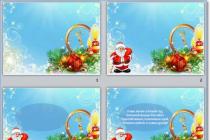
In the tab Layouts ready-made postcards are presented. Choose any you like with a tag For free:

We can edit and replace various layout elements. We click on the text of the layout and write a congratulation in Russian:


We also remove the extra characters from the top and write the text at the bottom of the postcard:

You can experiment with fonts and text formatting in the editor:

Now let's try to work with the image. Select the image and change its transparency:

If you wish, you can apply a filter, crop, flip the picture, and also change the interval between the background of the postcard and the image:

Once you are satisfied with the end result, click on the button Download:


The image processing will start. We wait a few seconds:

The default image will be saved in the folder C:\Users\%Username%\Downloads\.
If you need to create a postcard again, then click on the main page for this Create design:

We are looking for a section Events and select an object there called Postcard(see screenshot below):

Pro100Tak
This service is primarily focused on the Russian-speaking audience. Its main disadvantage is that the postcard is saved with a watermark. If you want to remove it, you will have to purchase a VIP status (50 rubles for 30 days of using the service).
Let's try to test this service. We go to the main page of the Pro100Tak service and create a new account, which we will need to export the postcard:

After confirming the account, click on the tab Postcards:


An editor window will appear. Here we can change various elements, apply filters, add our own pictures, change the color tone and edit the text:

There are even prepared verses for various holidays (button Poetry). You can insert them into your postcard using the appropriate option:

To save the postcard as an image, click the button. Save to computer:

Method 2: Microsoft PowerPoint
This program is convenient because it provides a huge selection of different effects, styles and decorations, without which it is difficult to imagine a bright and memorable postcard.
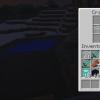
So, launch PowerPoint, select Layout → Empty slide:


Double click on the image and select drawing style:


Now let's try to add some text. For this you can use Insert → Inscription or Insert → word art. Let's use the last option:

We can also apply effects or transform our text using the option Format → Animation:

This is just an approximate plan for compiling a postcard. You can experiment with colors, styles, and the background of an image to get more interesting results.
To save the postcard, use the option File → Save as→ in the column File type select the image format (recommended JPEG or PNG).
Method 3. Graphic editors
There are a huge number of graphic editors that offer ample opportunities for creating postcards. Unfortunately, in practice, beginners have serious difficulties with choosing tools, searching for pictures, and arranging, so programs with a built-in postcard function, such as HP Photo Creations, are best for inexperienced users. The only disadvantage of such programs is paid access to the export of images.
A postcard is a great way to congratulate a loved one on a holiday, in this case Happy New Year. Many acquaintances and relatives live in other regions of Russia, cities and even countries, and it is not always possible to meet and celebrate the New Year with them. But you need to congratulate and make it pleasant, and here, more than ever, you will need a New Year's card made with your own hands and imagination.
In the good old days, at school, we made postcards at craft lessons: we drew, painted with watercolors and brought home. Now, there are special online graphic editors with which you can make a beautiful and bright card for the New Year and I would like to talk about them. After all, the New Year is just around the corner and it's time to prepare surprises for relatives and friends.
A unique and individual postcard is the best gift for the holiday, because it is made with your own hands and personally for a loved one. And sending a postcard made by graphic editors on the Internet is very simple, since you will have it in electronic form. You can send a postcard to the recipient by e-mail or in a message from the social network VKontakte, Odnoklassniki, Facebook, etc.
Now let's look at 5 services with which you can make a postcard for the New Year or other holiday.
How to make a greeting card online
Pro100tak.com
Pro100tak.com - free postcard designer for all kinds of holidays, including the New Year. I put it in first place, because the most understandable interface and any user with basic computer skills and the ability to move a computer mouse will be able to make a postcard.
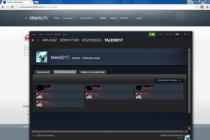
After loading the page of the Pro100tak postcard designer, all the tools and functionality of the online service will become available:
Insert an audio file, that is, musical accompaniment to the postcard.

The background of the postcard can be rotated, darkened, brightened, blurred and changed other parameters, like in all full-fledged graphic editors. And after you have finished creating a postcard, you can save it to your computer by clicking on the appropriate button or send it by e-mail.
And here is a video instruction on how to make a postcard online using the free postcard designer Pro100tak.com:
funphotobox.com
Funphotobox.com is a free online service for creating greeting cards from your photos. Here, the service is a little simpler than the previous one, since the main inclination is to create a postcard using a photograph or some kind of image. You can decorate with snowflakes, which can be done using the Snowflake service.

In order to make a greeting card, you need to select the appropriate holiday-themed template, upload a photo (from a computer or webcam) and then you can save the card to your computer.
funny.pho.to
Funny.pho.to is another service with which you can make a greeting card online for the new year. I already wrote about this service - Pho.to - online photo editor, read at your leisure. Here, too, everything is very simple:
We save to your computer.

- an online service where it is possible to create a greeting card. To do this, select the section of the Photo Frames service (create a photo frame) and select the appropriate category (in our case, New Year's). After uploading the photo by clicking on the Browse button. Enter the Signature and click the Create button.

123Greetings.com
123Greetings.com is the best site to send free online greeting cards to your loved ones. The site has wonderful cards for any occasion, such as Birthday, Anniversary, Wedding, New Year and many other events. The database of the service has more than one thousand beautiful postcards: animated, interactive, flash - postcards and simple ones.

Everything is categorized so it will be easy to find what you need. The service is absolutely free, but completely in English (an online translator will help here). As with the services listed above, 123Greetings.com it is possible to add your own text of congratulations to the card, everything is divided into categories, you can send it directly to e-mail, etc.
In this way, you can make a greeting card for the new year and congratulate your family and friends on this wonderful holiday that the whole world meets and celebrates. Congratulate your family and friends!!!
Who doesn't love the holidays?! Firefighting and preparation, friends and family, gifts and many kind words. And often many people come up with these very words on the go when they congratulate the hero of the occasion. Or there is a second option - buy a postcard and read a congratulation from it.
In this article, we will talk just about them, and I will talk about creating a postcard from scratch, if you want to do everything yourself, and how you can use ready-made templates in Word.
The need to make a postcard may arise for various reasons, for example, you did not have time to go to the store and buy it, you simply did not find the right one, or you wanted to show your talent and please a person with handmade work. I like to tell poems of my own composition for the holidays, and not read ready-made ones from a postcard, so I have to look for one that would be empty inside. And since it is difficult to find with an interesting cover and without scribbling, the “do it yourself” option can help out perfectly.
Let's start with ready-made options. Open any Word file, go to the top "File" and select "Create" in the menu on the left.

If you use Word 2013 or 2016, then also create a new document, and then enter the desired phrase into the search.

The difference is that in newer versions of the text editor, there are categories on the right, which makes it easier to find a postcard on a specific topic. That is, you need a Happy Birthday, Easter or March 8 postcard, just click on the appropriate item and available templates will appear in the area in the middle.

If the Word version is not new, then scroll through the list and find a suitable postcard template. Then select it and click on the button.

Once downloaded, it will open in a new window. On the top of the page, the upside down image is the cover, everything below is the inside.
First you need to print the first sheet, then turn it over and run it through the printer again. The result should be this: a picture, and on the reverse side there will be text. Cut and fold in half - done.
If there are notes in the margins, pay attention to them, there may be explanations on how to print and fold a postcard, where to insert the text.

You can change the template a bit. In the example, the middle will be white with text. Let's add a picture there to make it look more interesting. Open at the top "Insert" and click "Picture".

The top two cells must be drawn upside down. This is done so that later it turns out to print the postcard correctly.
In the upper left square will be the cover, in the right is the last page, at the bottom is the inside.

You can add pictures, for this you need to make sure that they are saved on your computer, areas with inscriptions and various shapes (you will find the desired button on the Insert tab). I will have images and an inscription.
I set italic to the cell with the cover and insert the picture. With the help of markers, I change its size, then I select the wrapping “In front of the text” and flip it 180 degrees.

For the last page, I simply chose a solid background, this is the cell fill, and inserted the inscription.

The next thing to do is to remove all internal borders so that they do not spoil the appearance. Leave a frame around so that it is convenient to cut. Select the entire table, open at the top "Designer", click on the arrow next to the button "Borders", and in the drop-down list, first click "No Borders", then "Outer Limits".

Now let's place the postcard on the page correctly so that during printing, after you turn the sheet over to the other side, everything on the second side lies as it should. To do this, you need to make sure that the values for the top and bottom margins of the page are the same.
Open the "View" tab and enable the display of the grid by checking the corresponding box. Then select the entire table and in the document on the ruler on the left move the markers so that the card above and below lies clearly on the grid. It should look like the screenshot. I have the top of the postcard coincides with the beginning of the grid, do the same at the bottom.

Then we go up to "Page layout", press the "Fields" button and select the item "Customizable". Note that the table must be highlighted.

Sum the values in the top and bottom boxes and divide by two.

Specify the resulting value in these fields and click "OK". Now you should have a postcard clearly in the middle relative to the top and bottom of the page.
It just so happens that we can not always personally congratulate our loved ones on the holidays. But there is a great way send a beautiful greeting to your mobile or email . A small e-card can be made in many ways. I offer two options:
- using the Xara Xtreme Pro program;
- using Photoshop CS6.
First option
Powerful yet easy to learn, Xara lets you work with vector and raster files at the same time. The program is suitable for creating photo compositions, flash animation and many other art objects. A very user-friendly interface, amazing file opening speed are good reasons to install such a program on your home computer. Xara is very popular with children, they comprehend it intuitively. Drawing in it requires less effort than in the popular MS Paint. The result is more professional drawings.
Open a new sheet for work using the key combination Ctrl + N. A vertical white A4 sheet and a gray field around appeared.
Note:
The peculiarity of Xara is that you can lay out graphic elements on the entire workspace. Here, objects do not go out of view if they are moved outside the print bounds. In any Photoshop, everything that has moved beyond the print area has disappeared from view.
On the workspace, create a rectangle 150 by 100 mm. When creating an e-card, remember that it will be sent over the network. So, the image should be light enough. The picture will be small, but readable. To do this, on the toolbar, click the rectangle symbol and drag the desired size with the cursor. We track the exact parameters in the plate of height and length. Color the rectangle blue by clicking on the corresponding square on the bottom panel. 
Through the File - Import menu, we collect the necessary decorative elements and photographs on the workspace. They will be placed on the same layer.
Note:
to create beautiful and high-quality postcards, it is better to use electronic scrap kits. This is a very handy form of clipart that can be purchased online. One archive contains elements and backgrounds on a specific topic. The components of one scrap-set are perfectly combined with each other. Most of the elements are isolated from the background and saved in PNG format. Such documents in Xara also open without a background, which is very convenient. 
We lay out frames, flowers, photos on a blue background for a future postcard. You can put a part under another one by pressing Ctrl+[, raise Ctrl+]. This method also works in Photoshop. 
When all elements are arranged, they can be grouped with Ctrl + J, ungrouped with Ctrl + U.
To place the text, it is better to create another layer. If you turn off the activity of the bottom layer, you can freely work with the text and are not afraid to damage the background. 
Activate the text icon (T) on the top panel, drag the line from left to right with the cursor and type the text. Color in red by clicking the corresponding square on the bottom panel. Select the font you like and double-click to activate it. 
Congratulations are almost ready. We slightly change the form of writing and size. You can copy the text, assign a white color to the bottom option and a white stroke, a shadow. Put a red layer on top. The text seemed to rise above the background, became more expressive.
Note: Strokes are very easy to work with in this program. There is a thickness scale on the top panel. Colors in Xara are located on the bottom panel. A simple click colors the object, a Ctrl-click colors the line. 
Note:
You can play with color transitions of the background. Copy the blue rectangle, color it light blue. On the top panel, activate the transparency icon (it looks like a glass goblet on a leg). Stretch transparency from top left to bottom right.
The final step is to export the finished postcard to a raster format through the menu File - Export - JPEG. Choose a resolution of 250 DPI.

Postcard is ready!!!

Second option
If you do not want to use ready-made frames from scrap kits, you can create your own composition from individual elements.
Let's set a new document in Photoshop 10x15 cm with a resolution of 250 DPI. This is a sufficient size for sending via mobile devices. 
Let's open the elements and background you like from the scrap-set. 
Arrange the elements arbitrarily. To do this, simply grab the image with the cursor and drag it onto the worksheet.
Note: To create a volume effect, we add a shadow to some shapes. By clicking on the layer line, we call up the style menu and set it up as we see fit. Light and light objects can be made translucent. To do this, change the opacity value down. The corresponding window is located in the upper right corner of the layers menu. You can add brightness to individual objects: the saturation and hue settings are activated by simultaneously pressing Ctrl + U. Exaggeration of natural colors in decorative postcards is justified.