Unfortunately, there are flaws in games: brakes, low FPS, crashes, freezes, bugs and other minor and not very errors. Often problems begin before the game even starts, when it won't install, won't load, or won't even download. Yes, and the computer itself is sometimes weird, and then in Hard Reset, instead of a picture, a black screen, control does not work, no sound is heard or anything else.
What to do first
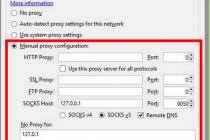
- Download and run the world famous CCleaner(download from a direct link) is a program that will clean your computer of unnecessary garbage, as a result of which the system will work faster after the first reboot;
- Update all drivers in the system using the program Driver Updater(download via direct link) - it will scan your computer and update all drivers to the latest version in 5 minutes;
- Install Advanced System Optimizer(download from a direct link) and turn on the game mode in it, which will end useless background processes during game launch and increase performance in the game.
System Requirements Hard Reset
The second thing to do if you encounter any problems with Hard Reset is to check the system requirements. In a good way, you need to do this even before the purchase, so as not to regret the money spent.
Minimum System Requirements Hard Reset:
Windows XP, Processor: Intel Pentium 4, 2 Gb RAM, 4 Gb HDD, nVidia GeForce 8800 Video memory: 512 Mb
Every gamer should at least have a little understanding of the components, to know why a video card, processor and other things are needed in the system unit.
Files, drivers and libraries
Almost every device in a computer requires a set of special software. These are drivers, libraries and other files that ensure the correct operation of the computer.
It's worth starting with the drivers for the video card. Modern graphics cards are produced by only two large companies - Nvidia and AMD. Having found out which product spins the coolers in the system unit, we go to the official website and download the package of fresh drivers:
A prerequisite for the successful operation of Hard Reset is the availability of the latest drivers for all devices in the system. Download the utility Driver Updater to easily and quickly download the latest drivers and install them with one click:
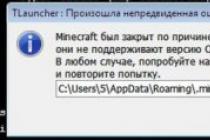
If Hard Reset does not start, we recommend that you try disabling your antivirus or put the game in the antivirus exceptions, and also check the system requirements again and if something from your build does not match, then, if possible, improve your PC by purchasing more powerful components .
In Hard Reset black screen, white screen, color screen. Solution
Problems with screens of different colors can be roughly divided into 2 categories.
Firstly, they are often associated with the use of two video cards at once. For example, if your motherboard has a built-in video card, but you play on a discrete one, then Hard Reset can be launched for the first time on a built-in one, while you will not see the game itself, because the monitor is connected to a discrete video card.
Secondly, color screens happen when there are problems with displaying the image on the screen. This can happen for various reasons. For example, Hard Reset cannot work through an outdated driver or does not support a video card. Also, a black / white screen may be displayed when working at resolutions that are not supported by the game.
Hard reset crashes. At a certain or random moment. Solution
You play for yourself, play and here - bam! - everything goes out, and now you have a desktop without any hint of the game. Why is this happening? To solve the problem, it is worth trying to figure out what the nature of the problem is.
If the crash occurs at a random point in time without any pattern, then with a probability of 99% we can say that this is a mistake of the game itself. In this case, it is very difficult to fix something, and it is best to just put the Hard Reset aside and wait for the patch.
However, if you know exactly at what moments the crash occurs, then you can continue the game, avoiding situations that provoke a crash.
However, if you know exactly at what moments the crash occurs, then you can continue the game, avoiding situations that provoke a crash. In addition, you can download the Hard Reset save and bypass the departure point.
Hard reset freezes. The picture freezes. Solution
The situation is about the same as with crashes: many freezes are directly related to the game itself, or rather, to the developer's mistake when creating it. However, a frozen picture can often become a starting point for investigating the deplorable state of a video card or processor.
So if the picture in Hard Reset freezes, then use the programs to display statistics on the loading of components. Perhaps your video card has long exhausted its working life or the processor is heating up to dangerous temperatures?
The easiest way to check the loading and temperatures for the video card and processors is in the MSI Afterburner program. If desired, you can even display these and many other parameters on top of the Hard Reset image.
What temperatures are dangerous? Processors and video cards have different operating temperatures. For video cards, they are usually 60-80 degrees Celsius. The processors are slightly lower - 40-70 degrees. If the processor temperature is higher, then you should check the condition of the thermal paste. It may have dried out and needs to be replaced.
If the video card is heating up, then you should use the driver or the official utility from the manufacturer. You need to increase the number of revolutions of the coolers and see if the operating temperature drops.
Hard reset slows down. Low FPS. Frame rate drops. Solution
With brakes and low frame rates in Hard Reset, the first step is to lower the graphics settings. Of course, there are a lot of them, so before reducing everything in a row, you should find out exactly how certain settings affect performance.
Screen resolution. In short, this is the number of points that make up the picture of the game. The higher the resolution, the higher the load on the video card. However, the increase in load is negligible, so reducing the screen resolution should only be the last resort, when everything else does not help.
Texture quality. Typically, this setting determines the resolution of texture files. Decrease the quality of textures if the video card has a small amount of video memory (less than 4 GB) or if you are using a very old hard drive with a spindle speed of less than 7200.
Model quality(sometimes just details). This setting determines which set of 3D models will be used in the game. The higher the quality, the more polygons. Accordingly, high-poly models require more processing power of the video card (not to be confused with the amount of video memory!), which means that this parameter should be reduced on video cards with a low core or memory frequency.
Shadows. They are implemented in different ways. In some games, shadows are created dynamically, that is, they are calculated in real time every second of the game. Such dynamic shadows load both the processor and the video card. In order to optimize, developers often abandon the full rendering and add a pre-render of shadows to the game. They are static, because in fact they are just textures that are superimposed on top of the main textures, which means they load memory, and not the core of the video card.
Often, developers add additional settings related to shadows:
- Shadow Resolution - determines how detailed the shadow cast by the object will be. If the game has dynamic shadows, then it loads the core of the video card, and if a pre-created render is used, then it “eats” the video memory.
- Soft shadows - smoothing out bumps on the shadows themselves, usually this option is given along with dynamic shadows. Regardless of the type of shadows, it loads the video card in real time.
Smoothing. Allows you to get rid of ugly corners at the edges of objects by using a special algorithm, the essence of which is usually to generate several images at once and compare them, calculating the most “smooth” image. There are many different anti-aliasing algorithms that differ in the level of impact on Hard Reset performance.
For example, MSAA works head-on, creating 2, 4, or 8 renders at once, so the frame rate is reduced by 2, 4, or 8 times, respectively. Algorithms such as FXAA and TAA operate a little differently, achieving a smooth image by calculating only the edges and using some other tricks. Because of this, they do not reduce performance as much.
Lighting. As in the case of anti-aliasing, there are different algorithms for lighting effects: SSAO, HBAO, HDAO. All of them use the resources of the video card, but they do it differently depending on the video card itself. The fact is that the HBAO algorithm was promoted mainly on video cards from Nvidia (GeForce line), so it works best on the “green” ones. HDAO, on the other hand, is optimized for AMD graphics cards. SSAO is the simplest type of lighting, it consumes the least resources, so in case of brakes in Hard Reset, it is worth switching to it.
What should be lowered first? Shadows, anti-aliasing, and lighting effects are usually the most stressful, so it's best to start with them.
Often gamers themselves have to deal with Hard Reset optimization. For almost all major releases, there are various related and forums where users share their ways to improve productivity.
One of them is a special program called Advanced System Optimizer. It is made specifically for those who do not want to manually clean up the computer from various temporary files, delete unnecessary registry entries and edit the startup list. Advanced System Optimizer will do this on its own and will also analyze your computer to find out how you can improve performance in applications and games.
Hard reset lags. Big game delay. Solution
Many people confuse "lag" with "lag", but these problems have completely different causes. Hard Reset slows down when the frame rate at which the picture is displayed on the monitor decreases, and lags when the delay when accessing the server or any other host is too high.
That is why "lags" can only be in network games. The reasons are different: bad network code, physical distance from servers, network congestion, incorrectly configured router, low Internet connection speed.
However, the latter is the least common. In online games, communication between the client and the server occurs by exchanging relatively short messages, so even 10 MB per second should be enough for the eyes.
There is no sound in Hard Reset. I can not hear anything. Solution
Hard Reset works, but for some reason does not sound - this is another problem that gamers face. Of course, you can play like that, but it's still better to figure out what's the matter.
First you need to determine the scope of the problem. Where exactly is there no sound - only in the game or in general on the computer? If only in the game, then perhaps this is due to the fact that the sound card is very old and does not support DirectX.
If there is no sound at all, then the matter is definitely in the computer settings. Perhaps the sound card drivers are not installed correctly, or maybe there is no sound due to some specific error of our favorite Windows OS.
Controls do not work in Hard Reset. Hard Reset does not see the mouse, keyboard or gamepad. Solution
How to play if it is impossible to control the process? The problems of supporting specific devices are out of place here, because we are talking about familiar devices - keyboard, mouse and controller.
Thus, errors in the game itself are practically excluded, almost always the problem is on the user's side. You can solve it in different ways, but, one way or another, you will have to turn to the driver. Usually, when you connect a new device, the operating system immediately tries to use one of the standard drivers, but some models of keyboards, mice, and gamepads are not compatible with them.
Thus, you need to find out the exact model of the device and try to find exactly its driver. Often, devices from well-known gaming brands come with their own software kits, since the standard Windows driver simply cannot ensure the correct operation of all the functions of a particular device.
If you don’t want to look for drivers for all devices separately, you can use the program Driver Updater. It is designed to automatically search for drivers, so you only need to wait for the scan results and download the necessary drivers in the program interface.
Often the brakes in Hard Reset can be caused by viruses. In this case, there is no difference how powerful the video card is in the system unit. You can check your computer and clean it of viruses and other unwanted software using special programs. For example NOD32 . The antivirus has proven itself from the best side and has received the approval of millions of users around the world.
Suitable for both personal use and small businesses, ZoneAlarm is able to protect a computer running Windows 10, Windows 8, Windows 7, Windows Vista and Windows XP from any attack: phishing, viruses, malware, spyware and other cyber threats . New users are given a 30-day free trial.
Nod32 is an antivirus from ESET, which has received many awards for its contribution to the development of security. Versions of anti-virus programs for both PC and mobile devices are available on the developer's website, a 30-day trial version is provided. There are special conditions for business.
Hard reset downloaded from torrent does not work. Solution
If the distribution kit of the game was downloaded via torrent, then in principle there can be no guarantees of work. Torrents and repacks are almost never updated through official applications and do not work over the network, because in the course of hacking, hackers cut out all network functions from games, which are often used to check the license.Using such versions of games is not only inconvenient, but even dangerous, because very often many files have been changed in them. For example, to bypass protection, pirates modify an EXE file. However, no one knows what else they do with it. Maybe they embed self-executing software. For example, which, when the game is first launched, will be integrated into the system and will use its resources to ensure the well-being of hackers. Or, giving access to the computer to third parties. There are no guarantees and there cannot be.
In addition, the use of pirated versions is, according to our publication, theft. The developers have spent a lot of time creating the game, investing their own money in the hope that their offspring will pay off. And every work must be paid.
Therefore, if you encounter any problems with games downloaded from torrents or hacked using certain means, you should immediately remove the pirate, clean your computer with an antivirus and a licensed copy of the game. This will not only save you from dubious software, but also allow you to download updates for the game and receive official support from its creators.
Hard Reset gives an error about the missing DLL file. Solution
As a rule, problems associated with the absence of DLLs occur when a Hard Reset is launched, however, sometimes the game can access certain DLLs in the process and, without finding them, crash in the most impudent manner.
To fix this error, you need to find the required DLL and install it on the system. The easiest way to do this is with a program. DLL fixer, which scans the system and helps you quickly find missing libraries.
If your problem turned out to be more specific, or if the method described in this article did not help, then you can ask other users in our "" section. They will promptly help you!
We thank you for your attention!
![]()
Hard Reset, aka Hard Reset, is done in two main ways. Regardless of the method you choose, take care of backing up your personal information, and also take out a memory card from your tablet and, just in case, a SIM card, if any.
1. Using the menu (if the tablet turns on)
If the tablet is fully functional, the graphic key is not locked, and you have the opportunity to get into the settings, be sure to use this method to make a Hard Reset (hard reset) and reset the user (user) settings to the factory settings (factory).
1. All you need to do is get into the settings and find the item Recovery and reset.
2. Then you need to select the item Reset.
4. As a result, Android will issue the last warning that you want to demolish everything, and you won’t be able to restore anything. If you have not changed your mind, choose a team Erase everything.
5. The tablet will be rebooted, and to show you the whole depth of the process, you will see a screensaver of how atoms and molecules are spinning in the belly of the Android robot.
6. This is normal, after a couple of minutes the splash screen will disappear, the tablet will start up with such factory settings and applications, as if you had just brought it from the store.
2. Through the Recovery menu (if the tablet does not turn on)
If a software failure occurred in the tablet, it stopped starting, there is an “eternal download”, or the device is locked with a graphic key - you have only one way out - to get into Recovery mode, i.e. recovery mode. The Recovery menu can only be accessed when the tablet is turned off. For this, a special combination of simultaneously or sequentially pressed physical buttons on the tablet, which are located on the device case, is used. This is usually the volume rocker +/-, the power button, and/or the home key. The general procedure is as follows:
1. Turn off the tablet. The battery must be fully charged. If you are not sure of a full charge, or a weak battery, it is better to carry out all the manipulations by connecting the tablet to the network
2. Hold down the key combination (examples of such combinations for your device model will be below), and wait until the Recovery mode opens
3. We move through the menu using the volume rocker (in some tablets, touch control is possible). Choose a team wipe data/factory reset(translation: erase database / reset to factory settings). To do this, you need to press your finger, if the control is touch, or the power key, which in this case serves as a button OK.
5. After that, you need to give the reboot command (reboot). To do this, select reboot system now(translation: reboot system now)
6. The tablet will think a little, all data and settings will be erased, and it will turn itself on.
It is worth noting that each tablet manufacturer sets its own set of keys for accessing the Recovery menu, so only general methods that are relevant for different brands of devices have been collected.
Attention! In the descriptions of the options for how you can get into Recovery, I will mention that the reset is carried out according to the standard, general procedure, or according to the blank. It means that you will need to use the blank with the photo described above.
How to make a Hard Reset on tablets from different manufacturers:
1) Samsung
Method number 1
- At the same time, we hold down the buttons: "Home" - the central button, the volume key "+", and the power key.
- We wait a couple of seconds when the Samsung logo appears, then we wait until Recovery mode starts.
- Let's release the previously pressed keys.
- Using the volume keys +/- go to the line wipe datafactory reset. To select an item, make a short press on the power key. Next, we do everything according to the preparation.
Method number 2, if there is no “Home” button, or when the keyboard shortcut does not work
- We hold down two keys: volume down “-”, and power
- As soon as you see the Samsung logo, you can release the power key. While holding the volume button. When a lying Android with an exclamation mark appears, you can release the button
- We make a hard reset (hard reset) according to the standard procedure
2) Asus
Method number 1
- Press the power and volume down buttons at the same time
- Release the keys when the recovery menu appears
- In the menu, look for the Factory Reset line, select it using the power button. We are waiting for the completion of the operation and reboot (reboot) the tablet.
Method number 2
- Simultaneously hold down the power key and the volume down rocker
- Wait until small text appears at the top of the screen, then release the keys
- As soon as you see the inscription Wipe Data, immediately press the volume key once (the main thing is to do this without delay). We are waiting for the reboot, we use it.
3)Lenovo
Method number 1
- It is necessary to hold down two more at the same time as the power button - adjust the volume (i.e. press the rocker in the middle), and hold for a few seconds
- Then just release these buttons, and make a single click on the rocker to decrease or increase the volume
- We are looking for the item Wipe data / Factory reset, select it with the power key, and wait until the reset process is completed.
Method number 2
- Press the power key and hold until you feel a slight vibration
- Immediately after that, you need to quickly press the volume up key several times (it may not work the first time)
- The Recovery menu will appear, then we reset according to the standard procedure
Method number 3
- Press the volume and power keys at the same time
- We release only when the Lenovo logo appears
- When you wait for the recovery menu to load, follow the standard procedure according to the template
4) Prestigio
Method #1 (works in most cases)
- Press the volume rocker up and the power button at the same time
- Let go when the Android logo appears
- After the appearance of the recovery, we perform a reset according to the standard
Method number 2
- Together with the power key, simultaneously hold down the volume rocker
- Wait for the tablet to start up, after which the power button can be released, do not release the volume rocker
- When the recumbent Android appears, release the key, and immediately press the volume rocker all the way. (That is, decrease and increase the volume at the same time). If nothing happens, repeat the procedure again until it works
- If you're lucky, you'll get to the Recovery menu, and then everything is as usual
5) Texet
Method number 1
- Volume up rocker “+” must be pressed simultaneously with the power button
- When the tablet reacts with vibration, you can release the power rocker, continue to hold the volume button
- As soon as the menu appears, the button can be released
- Next to the standard
Method number 2
- Press the Home key at the same time as the Power button
- When the Android logo appears, release the Power key, press it for a couple more seconds. Then press the volume key
- Next, we reset according to the template
Method number 3
- Simultaneously hold down the buttons: “Home” and power / lock. After a couple of seconds, release the "Power" key, while continuing to hold the "Home" key
- When you see the Recovery menu, you can release the button and reset according to the standard blank.
6) Sony
Method number 1
- The power and volume up keys must be pressed at the same time
- As soon as the screen turns on, release the power button while holding down the entire volume key at the same time
- After the menu appears, the button can be released, and then the standard procedure
Method number 2 (for tablets with a Reset button)
- Connect the tablet via the charger to the network, and wait until the green power indicator lights up, which is located near the device's power button
- On the case we find a hole with a Reset button, and press it with a thin object, such as a paper clip
- When the screen is off, press and hold "Power" for a couple of seconds
- Before the tablet starts to turn on, press the volume add button several times in a row
- When the recovery menu appears, do a factory reset
7) Huawei
Method number 1
- Press the power and decrease buttons at the same time, and hold for about 10 seconds until the menu appears
- Making a reset on the workpiece
Method number 2
- Hold the volume button in the middle, followed by the power button. Don't let go of the volume rocker while doing this.
- Hold for up to 10 seconds until the Android splash screen appears. At this time, you need to release the power key, but the volume button should remain pressed
- As soon as the image of the Android robot with gears appears, move your finger pressure from the center of the volume rocker to increase it
- Release the button only when the green loading bar appears
- Then all you have to do is watch the process. When everything can be demolished and the hardreset is done, the tablet will restart.
8) Ainol
- Hold down two buttons at the same time: power and volume rocker
- See the green robot on the display - you can release the buttons
- After that, the Recovery menu should appear. If the miracle did not happen, press once on the power button, or on "Home"
- Everything else is standard.
9) On Chinese tablets (including noname)
There are so many Chinese-made tablets that it is simply impossible to describe all the options for getting into the recovery menu. Try to test on the tablet all the methods described above - some will work anyway.
Also note that on most Chinese devices there is simply no Recovery mode. All that can be done in this case is to find the firmware for your tablet or a program for it, as well as instructions for it, and. Fill the tablet with pure Android, and it will work again.
How to make a hard reset on a tablet without volume keys
There are devices that nature has deprived of a volume rocker. General tips for this scenario:
- At random, try to get into the recovery mode by holding down "Power" and "Home" when the tablet is turned off. For example, hold down two buttons at the same time, and wait. Or like this: hold down the “Home” button. At the same time, press (but do not hold down) the power button once, then release the “Home” key. When the Android splash screen appears, press the Home button again.
- Even if you manage to get into Recovery, there is a problem with menu navigation. It is solved by connecting a USB keyboard via an OTG cable.
- If you still can’t get into recovery mode, the most clumsy option is to reflash the tablet.
Please note that this article is not exhaustive information on all tablet models. Therefore, if you did not find the manufacturer of your tablet in the list, try all the above keyboard shortcuts, perhaps some method will work for your device. If you have not managed to get into Recovery mode, write your tablet model in the comments, we will try to suggest if possible.
Smartphones are very popular and have become an important part of our lives and it is especially Android devices that take the crown of being the most used smartphones in the world. The ease of operation of devices based on the Android operating system along with the freedom of Android giving users to tweak several features has helped this wonderful OS from Google to claim the top spot.
Sometimes, it may be necessary to reset an Android device to factory settings. If you want to sell your device to someone or unlock your device, you will most likely have to do a hard reset. Most Android devices can be easily reset by pressing a combination of volume and power buttons. But hard resetting an Android tablet without volume buttons is a different game altogether, and arguably a lot more cumbersome. We are here to break that myth for you!
If your Android device is working well, hard resetting an Android tablet without a volume button won't be a big problem and can be done within just a few taps. But if the device is not working, this can be a problem. However, there are several methods to hard reset an Android tablet without the volume button. We have been able to list some of the easiest methods and describe them for you in the following sections. So read on to find out the methods to hard reset an Android device without using the volume buttons.
Part 1: Hard reset Android without volume button in recovery mode (need home button)
Reinstalling a smartphone or tablet is not very difficult, especially if there is a home button on the device. A combination of several button presses, including the home button, will be the first step towards the Factory Data Restore process. But if there are no physical volume buttons, the process can be quite different from conventional tablets. Only after booting your Android tablet into recovery mode, you will be able to hard reset your Android tablet without volume buttons. To learn how to reset an Android tablet without a volume button, follow the steps below. Remember that this method will only work if your Android device has a home button.
Step 1: Press the power button OFF + home button
Press the power button until the options Disabled, restart and others appear. Now click on the "shutdown" option and hold it while pressing the home button of your
Android devices at the same time.
Step 2: Confirm Boot in Safe Mode
Now, the screen to reboot into safe mode will appear. Click on "Yes" to enter Safe Mode.
Step 3: Enter Recovery Mode
until a new screen appears, press and hold the power button and the home button of your device at the same time. After it appears, release both buttons and press the power button again. Now press and hold the home button. With that you will enter recovery mode and a new set of options will appear on the screen.
Step 4: Go ahead and do a Factory Reset
Using the home button to navigate, move down to the "Wipe data/factory reset" option. Press the power button to select an option.
You may have to confirm your choice by selecting "Yes".

Step 5: Reboot your device
After the reset is finished, go to the "reboot system now" option and select it to reboot your device. At the end of this process, your device will be reset.

Part 2: Hard reset Android with point reset
There are many reasons why you decide to reset your smartphone or tablet. Sometimes a forgotten password can get your tablet locked. From time to time the screen of your smartphone or tablet may get stuck and unable to respond. Or the device may come with a non-removable battery to make matters worse. For all these issues, and many more, you can reset your device. But if your device doesn't come with a home button or a volume button, you can use another method. Typically, such devices come with a reset pinhole on the device that can be used to reset the device. In order to hard reset your tablet without the volume button, follow the simple steps below.

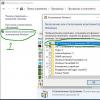
Step 1: Find Reset Tiny Hole
Look for a very small hole on the back or bezel of the smartphone. Typically, such pinholes are marked "Reset" or "Reboot" and are available on the top left side of the rear panel. But be careful not to confuse it with the microphone, as using it to reset the gadget can damage the small microphone permanently and lead to other complications.
Step 2: Insert the pin into the hole
After placing it, insert a stretched paperclip or a small pin into the hole and press down for a few seconds.
Now all data in your Android devices will be reset. After that, you can continue to use the device normally without any problems.
Part 3: Hard reset Android from settings (phone works fine)
If your Android tablet or smartphone is working properly, the device can be reset to factory settings using only your device itself. Even if the device does not have a home button or volume button, this method will still apply and can be used to reset the device. But before using this method to reset your Android device, make sure you back up all the necessary information that you have on your device. You can also sync all your important files to the cloud using your Google account. Also, be aware that this procedure will delete all accounts under which the device is signed. To know how to reset an Android tablet without a volume button, read on.
Step 1: Open the Settings app
Click on the settings app in the app section of your device to open it.
Step 2: Select the Data Reset Folder
After that, navigate or scroll down until you can find the "Backup and Reset" option. Click on it to open the folder.

Step 3: Click on Reset Data
Now swipe down to find the "Reset data" option and tap on it. A new screen will appear, asking you to confirm to continue with the process. Click on the "Reset device" button to start the process.

At the end of the process, the device will be reset and ready for use after the mandatory reboot is completed.
Thus, these are the methods with which you can make a hard reset without using the volume buttons. The level of complexity of the methods depends on the type and brand of the Android device. The last two parts can be easily done by anyone, and that too in a matter of minutes. However, the first method can create certain difficulties, in particular because manufacturers set different key combinations to reboot the device into recovery. However, once it's figured out, the rest is easy. Hence, it is up to you to decide on the method to be adopted to hard reset your Android device.
Users of modern devices have become accustomed to the useful function of rolling back the phone to factory settings. This helps to resolve most software problems or correct adjustments made to the machine's settings. It rarely happens that after a factory reset, the phone does not turn on. Why this could happen and how to solve the problem, we will learn further.

We already know that a hard reset does not always help return the phone to its original state, but, on the contrary, worsens an already distressed situation. After an unsuccessful rollback, you can observe that the android does not start, a dark screen remains, or a cyclic reboot occurs. That is, the device is able to show signs of life, but is not able to boot the OS.
In this case, users are divided into three conditional groups: the first do not understand what to do if the android is out of order, the second run to the service center, and the last decide to reflash the device on their own. The last option is the most dangerous, because from ignorance of the cause of the breakdown, the phone can turn into a “brick” with no chance of recovery.
Solution
- Try to reboot.
- Take out the battery for 20 minutes.
- Pull out the memory card and SIM card.
- Leave the smartphone on charge for at least 3 hours.
- Try flashing Android.
- Give it to the workshop.
Software malfunctions
The main reason why the phone does not work after a hard reset is a failure in the operating system. It could appear due to the installation of unverified applications on the device from an unprotected source. You should not discard the option of an unsuccessful OS update when, at the time of its installation, the device was accidentally turned off or the battery ran out.
Attempts to return the gadget to service fail and the phone stops turning on. In this situation, only the firmware of the device can really help. Together with it, all software failures will be deleted from the device’s memory, and the owner will receive a clean system.
It is worth mentioning the android owners who independently installed the incorrect firmware for themselves, which can also become a reason to refuse to boot the Android OS after a hard reset.

A nuance can be a factory reset through the gadget interface. Perhaps it will be possible to solve the problem through a deeper reset of the operating system, which is performed by entering a special code for a specific firmware version or gadget model.
If you still managed to turn on the device, check it for possible viruses that can hinder the operation of the software. Also, programs may be required to check the integrity of the internal memory. Due to its damage, unforeseen malfunctions occur that cannot be determined without a thorough diagnosis.
Important nuances of resetting settings

Anyone considering a rollback should keep a few rules in mind to keep their Android device running.
- Before making a hard reset, prepare the charger. If the battery runs out at the time of the system rollback, the software will be harmed. It has already been said earlier that in this case, only the firmware of the device can correct the situation.
- Even with a charger on hand, it’s better not to risk it and fully charge the battery. This advice is especially relevant for those who chose the usb connector on a PC or laptop as a power source. It is not able to provide the required voltage, which is why the gadget will not be able to make up for the full amount of energy expended and will simply turn off.
- Do not forget that when resetting the settings, all files in the internal memory are deleted. To avoid trouble, information can be copied to cloud storage, to a memory card or PC.
- Users who do this for the first time should follow the system rollback instructions provided by their device manufacturer. This will avoid difficulties with the operation and the loss of important contacts.
- If you notice that the battery behaves inadequately, independently replenishes the energy spent or sits down even when charging, it is better not to risk it and postpone the reset until you get a new battery.

Conclusion
Modern devices may have problems even after a full system rollback to the factory state. To avoid most of the malfunctions, you need to carefully study the above rules.
There may be several reasons why the phone refuses to boot: hardware failure or software malfunction. If a hard reset did not help you, you should not try to repair the device yourself. In a dire state of affairs, if the phone does not turn on, the best way to solve the problem is to visit a service center where professionals will take care of it.
Video
Are you using a smartphone or tablet? Is your device so clogged that it can't work properly? Are you going to transfer your smartphone to a new owner? Then you need to perform a factory reset. It will help to completely clear the memory and normalize the operation of the device. How to make a Hard Reset on Android and get your hands on a cleaned and ready-to-use smartphone or tablet? Our detailed review will tell about it.
During operation, the Android operating system becomes polluted with junk files generated as a result of applications and user actions. The result of this is "slowdown" and incorrect operation of the operating system. What to do if it has become simply impossible to use the device, and numerous cleanings no longer help? But what if you decide to sell your smartphone / tablet and want to delete its contents?
For all this there is a universal procedure, which bears one of the names:
- Reset to factory settings;
- Hard reset (Hard Reset);
What does this procedure do? It completely cleans the operating system and returns it to its original state.- it is in this form that it is after opening the factory packaging with the device. Also, user data stored in the memory of a smartphone / tablet is subject to deletion - these are photos, videos, documents, applications and much more. At the same time, all accumulated garbage is removed - after a reboot, we have at our disposal a perfectly clean device.
The easiest way to make a Hard Reset is to go to "Settings - Backup and master reset" and click the appropriate button here. The operating system will warn you about the deletion of important data and accounts, after which it will ask you to confirm your actions. If you confirm them, the system will go to reboot. After launch, it will be ready for the initial settings - connect to the network and enter account information, or simply transfer the device to the end user.
This procedure works on all smartphones running Android. How to make a Hard Reset on an Android tablet? Just like on smartphones - there are no differences.
Your device does not allow you to enter the menu? This happens when the operating system files are partially damaged. In this case, you should perform a Hard Reset on Android using special service codes similar to the most common USSD commands. Open the dialer, dial * # * # 7780 # * # * or * 2767 * 3855 # , confirm your intentions and wait for the results. If these commands do not help, try * # * # 7378423 #* # *.
Didn't that help either? Perhaps your smartphone or tablet hangs tightly while loading? Then you need to get into Recovery Mode. Turn off the device, hold down the key combination to enter Recovery Mode, select "wipe data / factory reset" in the menu that opens, confirm your actions and wait for the results. After the reboot, your device will be functional, but completely empty– all user data in the built-in memory will be deleted.

A limited number of people use programs for working with smartphone content - many prefer regular tools for copying data and synchronizing it. However, programs for smartphones and tablets (released by manufacturers) can quickly bring the device to life. We put a suitable application on the computer, connect the device and select the factory reset item in the menu - after that the smartphone / tablet will go to reboot.
Often, to solve software problems with the functioning of modern smartphones or tablets, you should perform a Hard Reset (hard reboot) or reset to factory settings android. In many cases, this helps to get rid of device freezes due to incorrect operation of some applications, system junk files, viruses, etc.
Is it possible to reset the phone to factory settings
The ability to reset the data is supported by any Andriod device, so every owner of this system can perform it. Before restoring the factory settings to android, it should be understood that at the same time you will completely lose all data except for those recorded on the memory card. There will be no more opportunities to restore them, a rollback of such actions is impossible. If you decide to reset the device to the factory state, then you will lose:
- entries in the phone book;
- applications;
- photographs, music, books;
- saved logins and passwords to accounts.
How to reset settings on android
Before carrying out this procedure, it is strongly recommended to copy important files, information (photos, videos, music) through the cord to the computer. It is better to make a full backup (copy) of the system, so that in case of an unsuccessful reset, you can restore the device's performance. There are 3 main options for how to reset android to factory settings:
- through the phone menu;
- using a combination of buttons;
- service codes.
Reset in phone settings
The easiest way to reset the settings on android to factory settings is the gadget menu. To do this, the device must work and be able to go to the main section of the system. For all smartphones running Android 4.0 or older, the procedure is as follows:
- Go to the main menu.
- Click on the "Settings" section.
- Find the "Backup and Reset" section.
- Scroll down the page and find the "Reset Settings" section.
- The system will inform you that the data will be deleted from the smartphone. Click on the line "Reset phone settings" and confirm the desire to "Erase everything". Items may vary slightly in different phone models, but the names are always the same.
Using Service Combinations
This method also requires the device to be turned on and be able to proceed to dialing. Each manufacturer programs their devices with special combinations that help to return to the factory state. This applies to both global brands (Samsung, HTC, Sony) and Chinese inexpensive models. The codes may change over time, they need to be specified on the manufacturer's website, sometimes they can be found in the manual for the smartphone. Below are examples of such combinations for reference:
- *2767*3855#;
- *#*#7378423#*#*;
- *#*#7780#*#.
Reset with keys using Recovery
The most radical method on how to reset the settings on an android to factory settings is the Recovery menu (recovery). This is the best way to return to the original state of the smartphone, if it hangs on the splash screen with the company logo, does not turn on. Each device model has a standard button combination that switches it to the Recovery menu. Sometimes you have to use recovery if:
- slowdowns in the phone have become too strong;
- the system does not allow you to delete, transfer or change anything.
First, turn off your phone completely. Wait until the buttons go out, the screen. Next, you need to find a suitable combination for your model (the combination for HTC and Samsung will definitely be different). You can use one of the options:
- button "volume down" + "power on" aka "Power" (the most common combination);
- on some LG phones, you need to press the above keys, wait for the logo, release the “power on” and then press it again;
- volume up + volume down + power on
- "Power" + "Home".
Hold one of the combinations until you are put into recovery mode to reset the device to the factory state. The menu is controlled by the volume up and down buttons. If the version of Recovery is touch, then you can reboot in the standard way (by touching the screen). To confirm the choice, you need to press the "Power" or "Context menu" button. Next, to reset the phone to the initial state, you need to:
- Find the item "Clear eMMC" or "wipe data / factory reset", sometimes it is also called "Clear Flash".
- Set a selection on it and confirm the action "yes - delete all user data" to reset the data.
- After the process is complete, select "Reboot System".
Video instruction: how to reset android to factory settings
Hard Reset, aka Hard Reset, is done in two main ways. Regardless of the method you choose, take care of backing up your personal information, and also take out a memory card from your tablet and, just in case, a SIM card, if any.
1. Using the menu (if the tablet turns on)
If the tablet is fully functional, the pattern is not blocked, and you have the opportunity to get into the settings, be sure to use this method.
1. All you need to do is get into the settings and find the item Recovery and reset.

2. Then you need to select the item Reset.


4. As a result, Android will issue the last warning that everything will be deleted, and you will not be able to restore anything. If you don't mind, click Erase everything.

5. The tablet will be rebooted, and to show you the whole depth of the process, you will see a screensaver of how atoms and molecules are spinning in the belly of the Android robot.

6. This is normal, after a couple of minutes the splash screen will disappear, the tablet will start up with the same settings and applications as if you had just brought it from the store.
2. Through the Recovery menu (if the tablet does not turn on)
If a software failure occurred in the tablet, it stopped starting, there is an “eternal download”, or the device is locked with a graphic key - you have only one way out - to get into Recovery mode, i.e. recovery mode. The Recovery menu can only be accessed when the tablet is turned off, using a special combination of simultaneously or successively pressed physical buttons on the tablet that are located on the device case, such as the volume rocker +/-, the power buttons, and / or the Home button.
1. Turn off the tablet. The battery must be fully charged. If you are not sure of a full charge, or a weak battery, it is better to carry out all the manipulations by connecting the tablet to the network
2. Hold down the key combination (examples of combinations for your device model will be below), and wait until the Recovery mode opens

3. We move through the menu using the volume rocker (in some tablets, touch control is possible). Choose an item wipe data/factory reset. To do this, you need to press either with your finger, if the control is touch, or with the power key, which in this case serves as a button OK.

5. After that, you need to give the reboot command by selecting the item reboot system now

6. The tablet will think a little, all data and settings will be erased, and it will turn itself on.
It is worth noting that each tablet manufacturer sets its own set of keys for accessing the Recovery menu, so we have collected methods that are relevant for different brands of tablets.
Attention! In the descriptions of the options for how you can get into Recovery, I will mention that the reset is carried out according to the standard procedure, or according to the blank. It means that you will need to use the blank with the photo described above.
How to make a Hard Reset on tablets from different manufacturers:
1)
Method number 1
- At the same time, we hold down the buttons: “Home” - the central button, the volume up key “+”, and the power button.
- We wait a couple of seconds until the Samsung logo appears, then we wait until Recovery mode starts.
- Let's release the previously pressed keys.
- Using the volume keys +/- go to the line wipe data \ factory reset. To select an item, make a short press on the power key. Next, we do everything according to the preparation.
Method number 2, if there is no “Home” button, or if the keyboard shortcut does not work
- We hold down two keys: volume down “-”, and the power button
- As soon as you see the logo, you can release the power button, and hold the volume button
- When a lying Android with an exclamation mark appears, you can release the button
- We do a hard reset according to the standard procedure
2)
Method number 1
- Press the power and volume down buttons at the same time
- Release the keys when the recovery menu appears
- In the menu, look for the Factory Reset line, select it using the power button. We are waiting for the operation to complete and reboot the tablet.
Method number 2
- Simultaneously hold down the power button and the volume down rocker
- Wait until small text appears at the top of the screen, then release the keys
- As soon as you see the inscription Wipe Data, immediately press the volume up key once (the main thing is to do this without delay). We are waiting for the reboot, we use it.
3)
Method number 1
- It is necessary to simultaneously hold down the two volume keys with the power key (i.e. press the rocker in the middle), and hold for a few seconds
- Then just release these buttons, and make a single click on the rocker to decrease or increase the volume
- We are looking for the item Wipe data / Factory reset, select it with the power key, and wait until the reset process is completed.
Method number 2
- Press the power key and hold until you feel a slight vibration
- Immediately after that, you need to quickly press the volume up key several times (it may not work the first time)
- The Recovery menu will appear, then we reset according to the standard procedure
Method number 3
- Press the volume up button and the power key at the same time
- We release only when the Lenovo logo appears
- When you wait for the recovery menu to load, follow the standard procedure according to the template
4)
Method #1 (works in most cases)
- Press the volume rocker up and the power button at the same time
- Let go when the Android logo appears
- After the appearance of the recovery, we perform a reset according to the standard
Method number 2
- Together with the power key, simultaneously hold down the volume rocker
- Wait for the tablet to start up, after which the power button can be released, do not release the volume rocker
- When the recumbent Android appears, release the key, and immediately press the volume rocker all the way (decrease and increase the volume at the same time). If nothing happens, repeat the procedure again until it works
- If you're lucky, you'll get to the Recovery menu, and then everything is as usual
5)
Method number 1
- Volume up rocker “+” must be pressed simultaneously with the power button
- When the tablet reacts with vibration, you can release the power button, continue to hold the volume button
- As soon as the menu appears, the button can be released
- Next to the standard
Method number 2
- Press the home button at the same time as the power button
- When the Android logo appears, release the power button, press it for a couple more seconds, and press the volume up key
- Next, we reset according to the template
Method number 3
- Press the home button and the power/lock button at the same time. Release the power button after a couple of seconds, while continuing to hold the Home button
- When you see the Recovery menu, you can release the button and reset according to the standard blank.
6)
Method number 1
- The power and volume up keys must be pressed at the same time
- As soon as the screen turns on, release the power button while holding down the entire volume key at the same time
- After the menu appears, the button can be released, and then the standard procedure
Method number 2 (for tablets with a Reset button)
- Connect the tablet via the charger to the mains, and wait until the green power indicator lights up, which is located near the tablet's power button
- On the case we find a hole with a Reset button, and press it with a thin object, such as a paper clip
- When the screen is off, press and hold the power button for a couple of seconds
- Before the tablet starts to turn on, press the volume add button several times in a row
- When the recovery menu appears, do a factory reset
7)
Method number 1
- Press the power and decrease buttons at the same time, and hold for about 10 seconds until the menu appears
- Making a reset on the workpiece
Method number 2
- Hold the volume button in the middle, then press the power button without releasing the volume rocker
- Hold for up to 10 seconds until the Android splash screen appears. At this time, you need to release the power key, but the volume button should remain pressed
- As soon as the image of the Android robot with gears appears, move your finger pressure from the center of the volume rocker to increase it
- Release the button only when the green loading bar appears
- Then all you have to do is watch the process. When the hardreset is done, the tablet will restart.
8) Ainol
- Hold down two buttons at the same time: power and volume rocker
- See the green robot on the display - you can release the buttons
- After that, the Recovery menu should appear. If the miracle did not happen, press the power button once, or the “Home” button
- Everything else is standard.
9) On Chinese tablets (including noname)
There are so many Chinese-made tablets that it is simply impossible to describe all the options for getting into the recovery menu. Try to test all the methods described above on the tablet - any one will work anyway.
Also note that on most Chinese devices there is simply no Recovery mode. All that can be done in this case is to find the firmware for your tablet, the program for the firmware, as well as the instructions for it, and reflash it. Fill the tablet with pure Android, and it will work again.
How to make a hard reset on a tablet without volume keys
There are devices that nature has deprived of a volume rocker. Tips for this arrangement:
- At random, try to get into the recovery mode by holding down the power button and the “Home” button when the tablet is turned off. For example, hold down two buttons at the same time, and wait. Or like this: hold down the “Home” button, press (but do not hold down) the power button once, then release the “Home” button. When the Android splash screen appears, press the Home button again.
- Even if you manage to get into Recovery, there is a problem with menu navigation. It is solved by connecting a USB keyboard via an OTG cable.
- If you still can’t get into recovery mode, the most clumsy option is to reflash the tablet.
Please note that this article is not exhaustive information on all tablet models. Therefore, if you did not find the manufacturer of your tablet in the list, try all the above keyboard shortcuts, perhaps some method will work for your device. If you have not managed to get into Recovery mode, write your tablet model in the comments, we will try to suggest if possible.
Do not worry if a smartphone with the Android operating system does not turn on or slows down very much, as you can reset it to factory settings. How to make a "hard reset" can be found below.

Why do a hard reset?
Hard reset is a special reboot, during which all settings are reset to factory settings, and absolutely all information (even personal information) is deleted. After it, the phone is crystal clear, as immediately after purchase. This feature is also called a hard reset, factory reset, and hard reset.
It is worth noting that before making a "hard reset" on Android, you need to back up all the data from the internal memory of the phone, because it will not be possible to restore them.
Anyone who thinks that this function is useless and even harmful is very much mistaken. A hard reset is used only if the phone cannot be restored with normal applications and cleanings. You should do it if:
- The phone began to think and boot for a very long time due to the large load of RAM.
- Due to the repeated installation and reinstallation of various applications, resulting in a huge amount of unnecessary information.
- After obtaining root rights, an important component of the operating system was removed, due to which the smartphone began to work incorrectly.
- Due to some kind of malfunction, the phone began to work incorrectly (it constantly reboots, turns off on its own or does not turn on at all).
Of course, after a "hard reset" is made, you need to configure everything, download, download and install it again. But, in turn, the phone will work as it should, and will not slow down (at least until a lot of different things are loaded into it again).
How to make a "hard reset"?
There are several ways to reset your phone to factory settings:
Now let's look at how to make a "hard reset" in each of these ways.
Soft reset
First of all, you need to save all the data from the phone. You can do this in many ways: create a backup copy and save it on a USB flash drive, connect to a PC and reset data using special utilities, synchronize with your Google account, and so on. It is also advisable to dump all the information from the flash drive and format it. This must be done because resetting the data removes the key to decrypting the data. If, after making a "hard reset" on Android, insert a memory card, the phone will simply create a new file system on it, ignoring the old file tree. Physically, the data will remain there, but there will be no access to it.
Now we do the following: go to the "Settings" of the phone, then to the item "Personal data" (depending on the firmware version, this item may be called "Accounts" or "Restore and reset"). Click on "Data reset" (Factory data reset).

Then - “Reset devices” and “Delete everything”. Ready.
Reset via Android system recovery
This method is resorted to if the phone does not turn on or constantly reboots. We turn off the phone. Recovery mode is enabled by pressing the power button, volume buttons and menu. How to make a "hard reset" using a combination of buttons? It all depends on the manufacturer:
- Sony - we charge the phone to the maximum (the light is green), disconnect it from charging and press the button in the small hole with a paper clip. After the screen turns off, you need to hold down the power button for a few seconds and press the volume up several times.

- Samsung - hold down the power, volume up and menu at the same time. Using the volume buttons, move to “wipe data / factory reset”, then “Yes - delete all data” and “Reboot now”.

- Nokia - hold down the power, volume down and camera.
- HTC - we hold down both volumes, press the power for a short while. When “Warning” appears, press the volume up.
- ASUS - clamps the volume down and for three seconds - power, hold the volume. Select “Enter recovery mode” from the menu. Further, the algorithm is the same as making a "hard reset" on the Samsung.
- Alcatel - hold the volume up and power. Further - as in Samsung.
- Acer - hold the volume up and power. Further - as in ASUS.
We reset the device from Sony
Sony Xperia devices have one problem: due to some kind of glitch or error in the system, when Bluetooth is turned on, the phone starts to reboot without interruption. However, you can turn it off only by disconnecting the battery. And, since for some reason it was not possible to make a "hard reset" on Sony through the Recovery mode, you can use the special PC Companion service utility from the manufacturer. It must be on the computer if the phone has ever been connected to a PC.

We proceed as follows. Launch PC Companion. Click "Start" in the Support Zone. In the column “Update phone software” also click on “Start”. In the window that appears, you need to click on the highlighted inscription “phone recovery”. Select your model from the list, and then follow the simple instructions.
But there is one caveat: the smartphone must be in the database of this program with downloaded drivers, otherwise, before doing a "hard reset", the program will ask you to perform several actions on the device for identification (lower-raise the curtain, etc.). Of course, this will not work if it is turned off.
Hard reset is an extremely responsible procedure, so you should take note of a couple of tips:
- Before you make a "hard reset" on your tablet or phone, you need to back up all your data (contacts, SMS, accounts, Wi-Fi passwords, etc.). There are plenty of ways and tools for this (if the device turns on at all).
- It would be useful to make a backup copy of the files from the flash drive. If only because in the settings the button for clearing the memory card is located under the shutdown button. And, inadvertently confusing, you can lose important data.
- Do not install applications from unsafe sources on your smartphone in order to avoid problems with the system.
- It should be more careful to use root-rights, if they are received. You should not delete what you are not completely sure of and allow different applications to use these rights.
- If suddenly, for some reason, resetting to the factory settings could not be done, you can fix the phone by flashing the “Android”. Contrary to popular belief, this is quite easy to do. It will take only sensible instructions, hands and a bright mind.
Tablets on the Android OS have many advantages, the main of which is the relative cheapness of the device. But for all low-cost Android devices, there comes a moment when your fast and productive gadget starts to terribly slow down, lag and freeze (freeze is a delay in rendering frames in a game or system). Replacing the tablet with a new one does not seem like the best solution, because not so long ago it worked as it should. Then you can return the gadget to factory settings or do a factory reset - this will surely help breathe life into your device. In this article, we will show you how to make a Hard Reset on an Android tablet using various methods.
Why rollback settings
The main reason why users remove all their settings and applications from the device is the insufficient speed of its operation. Overloaded with various programs, games, sometimes even viruses picked up on the Internet with a pirated game or program, the gadget can no longer cope with everyday tasks and begins to infuriate with its slowness! In such a situation, Hard Reset will really help restore the gadget to its former performance.
Incorrectly installed custom (unofficial) firmware can also be the reason for the complete cleaning of the tablet on Android. However, in this case, a hard reset will not be enough: you will also need to install the official service firmware in order to put the tablet in order. But it's a little more difficult
Errors caused by obtaining root rights (the so-called access to the root file system of the device, which allows you to change a large number of settings) or improper use of applications that require these same root rights. It is worth noting that after a hard reset, you will lose root rights and, if necessary, you will need to get them again.
Reset via the settings menu

Let's start with the simplest way - resetting the settings in the settings menu. This method is suitable for those who want to remove absolutely all installed applications, all files, all accounts and everything from the tablet. If you didn’t install unofficial firmware (if you don’t know what it is, then you definitely didn’t install it), then you will receive a tablet in the same condition as when you bought it. Therefore, before cleaning the gadget, transfer all the necessary files to your computer or to the cloud. It is also worth noting that for this operation, the device must be at least half charged.
Let's consider this operation step by step:
- First, go to settings, click on "Backup and reset".
- Here we are interested in "Reset settings". You will be reminded that if you reset the settings, you will lose all data stored on this tablet.
- If you are sure that you are ready to reset, press the "Reset settings" button (well, or something similar, the inscription for some reason changes from tablet to tablet).
- A robot will appear in which gears or some geometric figures resembling the atomic structure of some substances are spinning.
- After 5-10 minutes, the tablet will boot itself.
Attention! Before performing this operation, be sure to remember to copy all important data from the device, otherwise it will be quite difficult to restore them.
Reset via service code

If for some reason the settings menu does not appear for you, you can do a Hard Reset (reset settings) by entering a special service code in the "Phone" application where you usually dial the phone number of the called subscriber (if you have such an application on your tablet at all) . Here is the code itself: *2767*3855# . Be careful as no warning before recovery will pop up. Further processes occurring with the tablet are similar to those described in the first method.

In recovery mode, you can apply various updates or restore the device at the software level. This method can be used if the tablet does not turn on. Make sure your gadget is charged. If it was on, turn it off. To get into recovery mode, follow the instructions for your model:
- SAMSUNG: On a Samsung tablet, hold down the volume up, power, and home buttons until they vibrate slightly;
- LENOVO: on a Lenovo tablet, you need to simultaneously hold down both volume buttons and hold for a few seconds, then release them and press the volume down key once;
- SONY: Hold down Volume Up and Power buttons until the screen turns on. After that, stop holding the power button and start holding both volume keys;
- HUAWEI: Hold down the volume down and power keys for about ten seconds;
- PRESTIGIO: On the Prestigio tablet, in order to start the recovery, you need to hold the volume up and power key.
After entering the menu in any of the presented manufacturers, using the volume buttons or the screen touch, select Wipe - Wipe data/Factory rese t (selection is made either by pressing the screen, or the power button, or the home button). The tablet itself will do everything and reboot.
Reset using a computer

If there are no volume buttons on the tablet, then you can reset through the computer. This is done by programs produced by the manufacturer of your tablet. It makes no sense to describe the recovery process in this way, because Each program must have its own instructions. You can find the desired program and manual for it on the Internet on the manufacturer's website. All you need is a USB cable from the gadget's box to connect it to a PC, drivers downloaded in advance, and some free space on the hard drive of a computer or laptop.