Have you come across very realistic, high-contrast photographs? Are you wondering how to do the same? The matrix of a digital camera is unable to simultaneously record information both in the dark areas of the image and in the light ones. Some part of the image will be overexposed (as a result, details will be lost, for example, clouds), some will be underexposed. This is due to the low dynamic range of the sensor. However, by capturing three different shots, combining them into a high dynamic range (HDR) image and applying digital processing, you can create a photo that fully captures the beauty and details of the scene in the frame.
Steps
Taking photos
-
Download and install the program. There are other HDR creation software out there, but Luminance HDR is free and works on many platforms like Windows, Linux and Mac OS.
Close all running programs before starting the process. Tone mapping creates a serious load on the processor and the computer can "slow down".

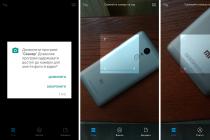
Launch Luminance HDR and click "Create HDR Snapshot". In the window that appears, click "Next", then click the green plus sign to add 3 photos you took. Luminance HDR reads extract values from EXIF data. Sometimes, for example if you used an old DSLR lens through an adapter, you will have to enter the shutter speed manually. Then click Next.
Skip the next window too. The parameters you set affect the final result, but the defaults work very well. Click on To complete... You have a high dynamic range image, but it cannot be displayed in a low dynamic range format (such as the usual JPEG format). This is where tone mapping comes in: by compressing the dynamic range of the image you create, it displays a higher dynamic range in a 24-bit image.
Compress. In the tone mapping window, you will see a set of parameters and compression algorithms. In most cases, the Mantiuk algorithm (first on the list) works very well. If you wish, you can experiment with other algorithms and settings. Click the "Tonemap" button to complete the process.

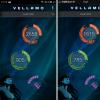
Start small. Experiment with algorithms and other settings on a smaller version of your photo. Tone mapping is a resource-intensive process. It can take several minutes to process a full-size image using Mantiuk's algorithm, but a 256x170 image will be ready in a second.
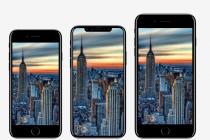
Choose a storyline. HDR is great for bringing out details in almost any scene, so choose as you see fit. If nothing comes to mind that others are filming in HDR. If you still have no ideas, choose a landscape with clouds - clouds in HDR come out especially impressive.
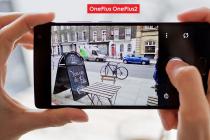
If the camera (or worse, the object in the frame, as in this case) moves, the image will "double" and look lousy. Lock the camera! Install the camera. Mount the camera on a tripod, if you have one, or place the camera on a stable surface. If you have a camera remote so much the better, if not, use a timer. The main goal is to ensure that the position of the camera does not change between shots. If your camera has Auto Bracketing, use it (Canon cameras call this feature AEB). Setting the exposure bracket to +/- two stops is usually sufficient to produce high-quality HDR for most motifs.

Take photos. If you have set the auto bracketing settings, just shoot 3 frames in a row. If you do not have bracketing function, we take several shots, varying the shutter speed. For example, you can start with a fairly slow shutter speed (1/250 sec, 1/125, or 1/60 sec), gradually decreasing the shutter speed (1/500 or 1/1000). As a result, you will get 3 images: normal, overexposed and underexposed.
Copy the received photos to your computer. Now let's tweak and create an HDR image from the three photos you captured.