This article will help you install any Linux distribution from a Windows machine directly from an iso image on your hard drive. The article can help netbook owners, as well as those who, for whatever reason, cannot use a regular installation disc.
Installing Grub4Dos
For starters, Grub4Dos. At the time of this writing, the latest stable version is Grub4Dos 0.4.4Win XP / 2000
- Unpack grldr and menu.lst
- Editing boot.ini... You may need to remove the "read only" attribute to be able to save the file
attrib -r boot.ini - Add to the end of the file
C: \ grldr = "Grub4Dos"
Win Vista / 7
- Unpack grldr, grldr.mbr and menu.lst from the archive to the root of the disk with Windows installed.
- We launch the console as administrator and execute
bcdedit / create / d "Grub4Dos" / application bootsector - In response to the previous command, we will receive the id of the created record, which we will substitute in the next three
bcdedit / set (id) device partition = C: bcdedit / set (id) path \ grldr.mbr bcdedit / displayorder (id) / addlast
Edit menu.lst
Add a new item to the bootloader menuTitle Boot Installer fallback 1 root (hd0,1) kernel / vmlinuz vga = normal ramdisk_size = 14972 root = / dev / rd / 0 rw - initrd /initrd.gz
Here we substitute the disk number and the partition number for yours. If Ubuntu is installed, then you can download (amd64) the necessary images vmlinuz and initrd.gz... In other cases, they can be found in the iso image of the distribution itself. For reference, here is a small table of names in different distributions.
| Ubuntu | vmlinuz | initrd.gz |
| Debian | vmlinuz | initrd.gz |
| Fedora | vmlinuz | initrd.img |
| Mandriva | vmlinuz | all.rdz |
| openSUSE | linux | initrd |
| Slackware | bzImage | initrd.img |
| Gentoo | gentoo | gentoo.igz |
Now copy the iso image of the distribution into the resulting heap and reboot.
Installation
Perhaps the installation is slightly different in different distributions. I'll walk through the installation using Ubuntu as an example.After the reboot, a new item will appear in the Download Manager. We choose
The Grub4Dos bootloader will appear. Choose "Boot Installer"
The installer will prompt you to select a language. We choose our great and mighty
The installer may not be able to find the image on its own
In this case, you need to re-run the search from the main menu and specify the location manually
After selecting the image, a few more familiar windows will appear and the installation will begin.
Edit menu.lst. Option # 2
Alternative menu.lst is also possible.Title Boot Installer fallback 1 find --set-root /image_name.iso map /image_name.iso (0xff) || map --mem / image_name.iso (0xff) map --hook chainloader (0xff) savedefault --wait = 2
No additional gestures are required here - the usual Ubuntu installer will load.
Since the image is loaded from the hard disk, I advise you to pre-allocate a partition for the OS and swap before starting the installation.
Wubi is the way to install an Ubuntu distribution. It allows you to install Linux on Windows as an application. And when the computer turns on, the Windows bootloader offers two operating systems - Windows and Ubuntu.
No need to flatter yourself, Ubuntu (Wubi) is not a full-fledged Linux system, but depends on Windows, which has the following disadvantages:
- Performance is a little lame... Faster than Live-CD, but slower than standalone OS. There are two reasons for this. The first is the fragmentation of the Windows file system, which Linux has to put up with in this case. Second, all Linux is stored in one file on the Windows partition. The file system (FS) of Ubuntu through Wubi differs from the natural file system for Linux, hence the second drawback.
- Instability... FS Wubi does not tolerate "incorrect" system shutdowns: reboot (reboot with a button), power off (power off). In other words, it may not boot next time.
- Windows dependency... If you uninstall Windows (or it decides to "shut itself down"), then you will not be able to boot Ubuntu. All you can do is reinstall Linux.
Nevertheless, if there is Wubi, then it seemed to someone a reasonable decision. The method has its advantages:
- Fast installation... If there is a pre-downloaded ISO file, then Linux is installed in a few minutes.
- Installation is very easy... Nothing different from installing your average Windows application. There are a few parameters that will need to be specified, but in fact, Wubi offers appropriate options by default. No need to play with partitioning under Linux (although the process itself is simple, it is seriously alarming for beginners).
- Quick removal... Just find Wubi in any application manager and uninstall. After the next reboot, there will be no Ubuntu.
So Wubi is a quick way to try Linux and see that Ubuntu isn't as scary as it sounds. You can even work in Ubuntu from Wubi for a while, but here you need to monitor the stability of Windows so that you do not have to fiddle with the backup and reinstall the OS for several hours later.
Installation via Wubi
Installing Linux via Wubi is pretty straightforward. Therefore, we will consider it in general terms and move on to some of the nuances.
The first thing to do is download the Linux ISO image. You can find such a file on the website of any distribution kit.
Then you need to run it through a virtual machine, for example, Deamon Tools.

If you run Wubi.exe directly from the image, you will most likely see two options: try Live-CD b full installation after reboot. This option does not correct us. So just copy Wubi.exe to any folder on your computer. This is my desktop.

Click on the file you copied. A dialog box with options will open - disk for installing Linux, how many GB are you willing to allocate for the system, language, etc. Usually, by default, all parameters can be accepted, you just need to enter (and remember!) The user's password.


When the installation process is complete, just restart your computer. And after a few seconds, you will see a choice of system - Windows or Ubuntu.
32 or 64 bit Linux Ubuntu
First of all, you need to start from the amount of RAM. If 2 GB - the choice is unambiguous in favor of a 32-bit OS. 6-8 GB - 64-bit OS. 4 GB of RAM is perhaps the most common option, and here you have to think about it. With this amount of RAM 32-bit or 64 - the difference is not very noticeable. On the one hand, a 32-bit system may not recognize all 4 GB of RAM (although Linux does a better job of this than Windows). On the other hand, 64-bit applications (like the OS itself) are more resource-demanding. Some 64-bit programs consume twice as much RAM as their 32-bit counterparts. Plus, the number of applications for 64-bit systems is limited.
Wubi solves this problem quite straightforwardly: if you have a 64-bit processor, install the 64-bit version of Ubuntu. You can see this in the last screenshot. Although I ran a 32-bit OS image, the installation started by downloading Ubuntu 64-bit. Fortunately, there is a way to make Wubi obey:
- Copy the Wubi.exe file and the Ubuntu ISO image (32 or 64 - whichever you need) to any folder;
- Disconnect the internet and run the copied Wubi.exe file. Wubi will start extracting files from the image next to it - there is no choice.
So, if you decide to seriously migrate to Linux, it is better to install the OS in the traditional way - on a separate partition as a single OS or in parallel with Windows. This will make Linux run more stable and faster. If you just want to try Ubuntu, then why not - install through Wubi - this is the fastest way to take a closer look at Linux.
Linux can come in handy for many reasons. For example, your old computer cannot be upgraded to newer versions of Windows or macOS, or you need specific Linux applications, or you are just curious to try a new one. Or maybe you just bought a new computer without an operating system and want to save money by choosing free Linux.
Installing Linux is easy. Of course, there are distributions like Arch, which is quite difficult to install for a beginner. But most modern distributions are very easy to install. Perhaps even simpler and faster than Windows.
Before installing Linux on your main computer, back up your important data. While working with partitions on your hard drive, you can inadvertently erase something important. Of course, if you follow the instructions and carefully read what you are doing, then nothing unexpected will happen. But - not a superfluous thing in any case.
You can install Linux on computers running Windows and macOS, or on an empty hard drive. You can choose Linux as your main system, or use it alongside your old system.
1. Download the Linux distribution
First of all, you need to choose a Linux distribution. The DistroWatch.com rating will help you decide.
Then you need to download the selected distribution. It's easier to do this: open the site of the required distribution kit, find the download section and select the one that suits your processor's bitness.
As a rule, Linux distributions on the official sites are offered to download in two ways. The first way is normal download. The second is through P2P via a torrent client. The second way is, of course, faster. So choose it if you want to save time.

When the ISO distribution is downloaded, you need to burn it to a CD or a regular USB flash drive.
Burning to CD can be done using standard system tools: "Burn disk image" Windows or "Disk Utility" macOS. It is enough to click on the loaded image with the right mouse button and select the corresponding item in the menu.

You will need special utilities to burn ISO to a USB flash drive. For Windows, choose Rufus, and for macOS, choose UNetbootin. These programs have a very simple interface, it is rather difficult to get confused in them.
3. Prepare the disk partition
This step should be performed if you want to keep the system installed on you and use Linux at the same time. If you decide to transfer your computer to Linux completely or install the OS on an empty hard disk, skip this paragraph.
Windows

Open Windows Disk Management Tool. Select the disk or partition from which you plan to cut some space for your Linux installation. For most distributions, 10 GB is more than enough. But if you plan on installing a lot of apps, take more. Right-click on the partition and select Shrink Volume. Enter the size and click OK.
The process can take quite a long time, so please be patient.
When Disk Management finishes resizing partitions, an empty unallocated space appears on the disk, marked in black. We will install Linux there.
Later, if you do not need Linux, you can delete partitions with it and give the freed space back to Windows using the same "Disk Management Tools".
macOS

You can allocate space for your Linux installation through the macOS Disk Utility. Select your drive and click on the "+" sign to create a Linux partition. It may take a while to create a new partition.
4. Prepare the bootloader
Windows
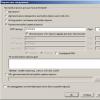
This item only applies to new computers with preinstalled Windows 10, 8.1, or 8. These computers use a UEFI boot loader that will prevent you from booting any system other than Windows.
To fix this, go to your computer's BIOS settings and disable the Secure Boot option. Then reboot. Done, you can now download and install other systems alongside your Windows.
macOS
Unlike most computers, Mac requires a couple of additional steps to install Linux on a dual boot with macOS.
First of all, disable SIP. Reboot your Mac and press Cmd + R. The Recovery menu appears. Select "Terminal" in it and enter csrutil disable.
Restart your Mac again. SIP is disabled.
Manual
Suitable if you want to set the dimensions for your partitions yourself or, for example, create a separate partition for your files. To do this, select "Another option" and click "Continue".

Linux will display what partitions you have on your computer. You can delete them, format, or, conversely, leave the sections with the information you want to keep.
To install Linux instead of your system, select the partition with the installed system and remove it with the "-" button. Then create new partitions in the vacant space.

- Root partition for Linux system files. Select the Ext4 file system and mount point /.
- A swap partition, or swap partition, comes in handy if you don't have enough RAM, but a fast SSD. Select Swap Partition from the list of file systems.
- Home section where your files will be stored. Select the Ext4 file system and the / home mount point.
Click "Continue" and confirm the changes. The installer will erase the partitions you selected and create new ones in the vacated space.
How to install Linux next to the current system
There are two ways to install Linux alongside your system.
Auto

Most Linux installers will immediately detect the systems you have installed. If you did not create a separate disk space for Linux, then you can try to select the "Install next to Windows" option. The installer will create the necessary partitions on its own, and you will not have to do anything manually.
Manual

If you want to decide for yourself how much space to allocate to the system, and followed the instructions in step 3, click "Other option" and click "Continue". You will see your disk partitions and the empty space that we have prepared for Linux. Create a root partition there (mount point /) as described above. The home section is not necessary in this case: you can copy and modify files on your main system.
Click Continue. The installer will leave your files where they are. It will simply create new partitions in the free space. You will be able to choose which system you want to boot at startup.
8. Complete the Linux installation


You will then be asked to introduce yourself. Enter your name and create a password. Do not forget the password, as you will always need it to complete tasks on behalf of everyone. You can encrypt your home folder if you want.
Then just wait. When the installation is complete, you will be prompted to remove the installation disc and reboot. Do not forget to disable booting from external drives in the BIOS if you enabled it.
What to do after installation
When you reboot and your Linux desktop appears in front of you, you can do everything you do in Windows and macOS: surf the Internet, edit documents and listen to music. Do not forget to update and take a look at the "Application Store" (or its equivalent, depending on the distribution kit) to install the applications you need.
Try Linux and you will see that it is no more difficult in everyday life than Windows or macOS.
Have you thought about switching from Windows to Linux? Surely many are visited by this thought, because Microsoft is now pursuing not the best policy, while Linux distributions, and free software in general, are gaining popularity. A rough transition can lead to a lot of problems, so the most popular advice for newbies is "Put the distribution on the second system next to Windows." And due to the fact that one of the most popular Linux distributions is Ubuntu, today I will talk about how to install Ubuntu alongside Windows 7.
Ubuntu next to Windows 7: dualboot
Dualboot means "dual boot" in English. This implies that you can boot into both Ubuntu and Windows. The good thing about this approach is that you don't have to struggle to find a particular software package. It will be enough just to boot from Windows, where everything will remain as before.
Before starting the installation, we will need to prepare a hard drive from under Windows.
Preparing a hard drive in Windows
To prepare a free space for installing Ubuntu next to Windows 7, we need to right-click on the "Computer" shortcut, and then go to "Manage".
In the window that opens, we need to find the "Disk Management" item and go to it:

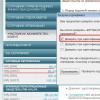
Now, by right-clicking on the disk, from the context menu, we go to the "Shrink Volume" item. Basically, by the standard, you will have two partitions here: the system partitions (C) and the file partitions (D). It is best to “bite off” the space from the file partition, leaving the Windows system partition alone.

For Ubuntu to work comfortably, we need about 80GB of free space (for several disks, I'll talk about this later). If you have more space available, for example 100 or 120GB, then you can measure as much. It will not be superfluous.

As you can see, after this operation, the "Free space" field appeared in the window, it is this space that we will use to install Ubuntu. You, of course, should have somewhere between 80-100GB, while I (in the screenshot) have 2GB as an example.
Burning an image on Ubuntu to an installation media (USB)
It is best to use Rufus or Etcher for this purpose. You can download them from the official sites, and what is good, their interface is quite simple (especially the latter). However, I have described this process in the article. You can also familiarize yourself with it.
After you capture the image, leave the USB stick in the slot and restart your computer.

Now we have to install the system itself. We select the desired language in the left list, and then proceed to the installation of the system.

Do not forget to mark these two checkboxes (updates and third-party software), because in most cases this can be useful.
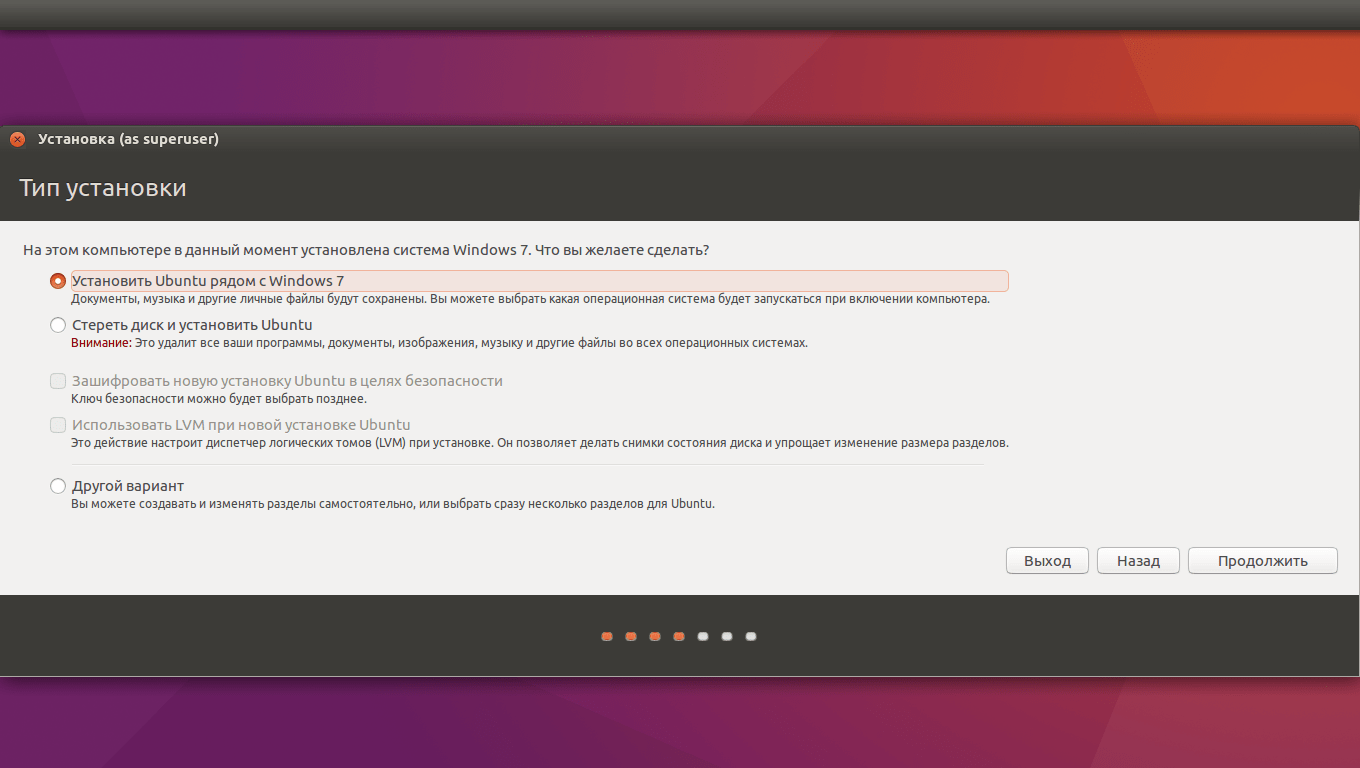
We need to choose the optimal installation type. You can opt for the "Install Ubuntu next to Windows 7" option, which should automatically allocate free space. I'll take a closer look at manual disk partitioning.
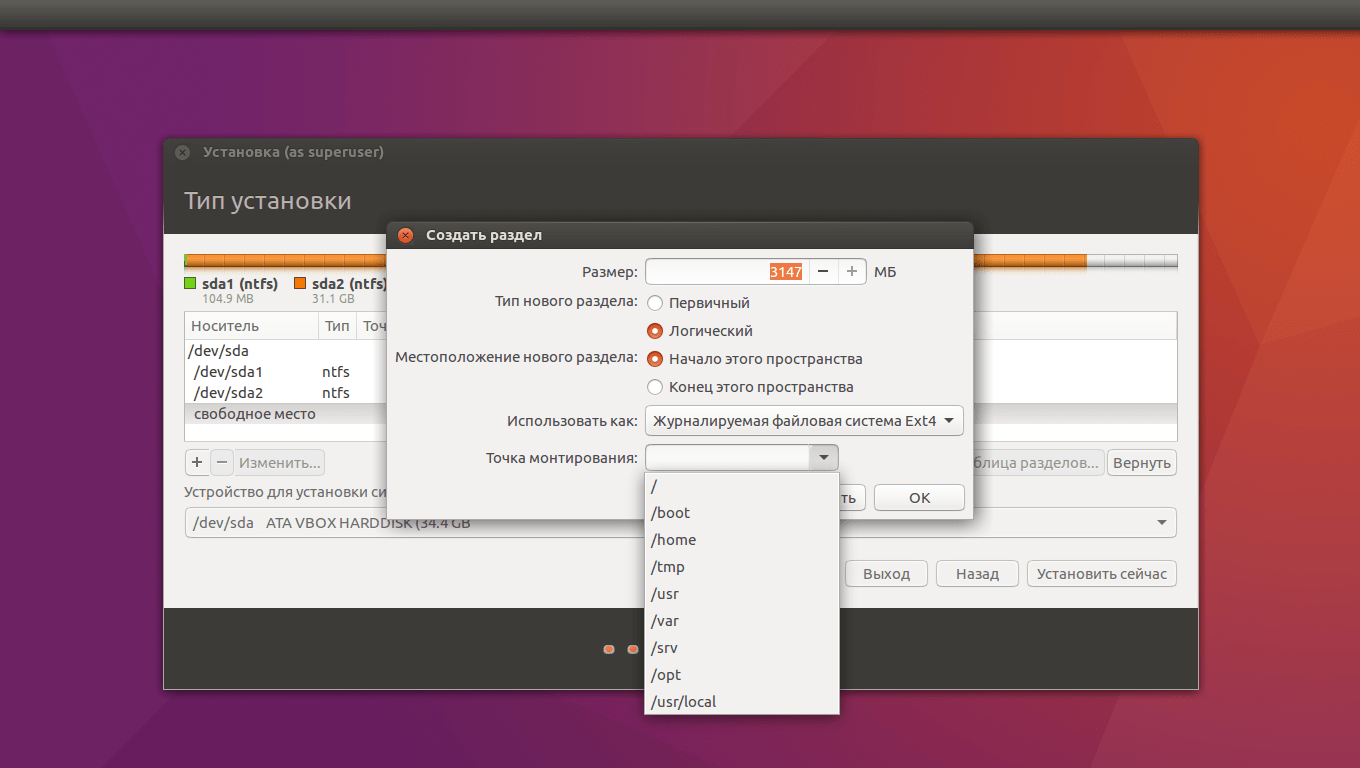
So, select the free space and click the plus sign on the left. You will see such a window pop up, and with its help you need to create the following sections:
- System partition: size 20000MB, partition type: logical, partition location: start ..., use as: Ext4 (leave it as it is), mount point - "/".
- Swap partition: 4000-5000MB in size, use as: swap partition. Section location: end of this space, leave the rest as it was.
- Home partition: give it the remaining free space, use it as: Ext4 (as in the first case), mount point - "/ home", partition location: the beginning of this space.
After the markup, click "Install Now", confirm the changes, and proceed to the location selection.
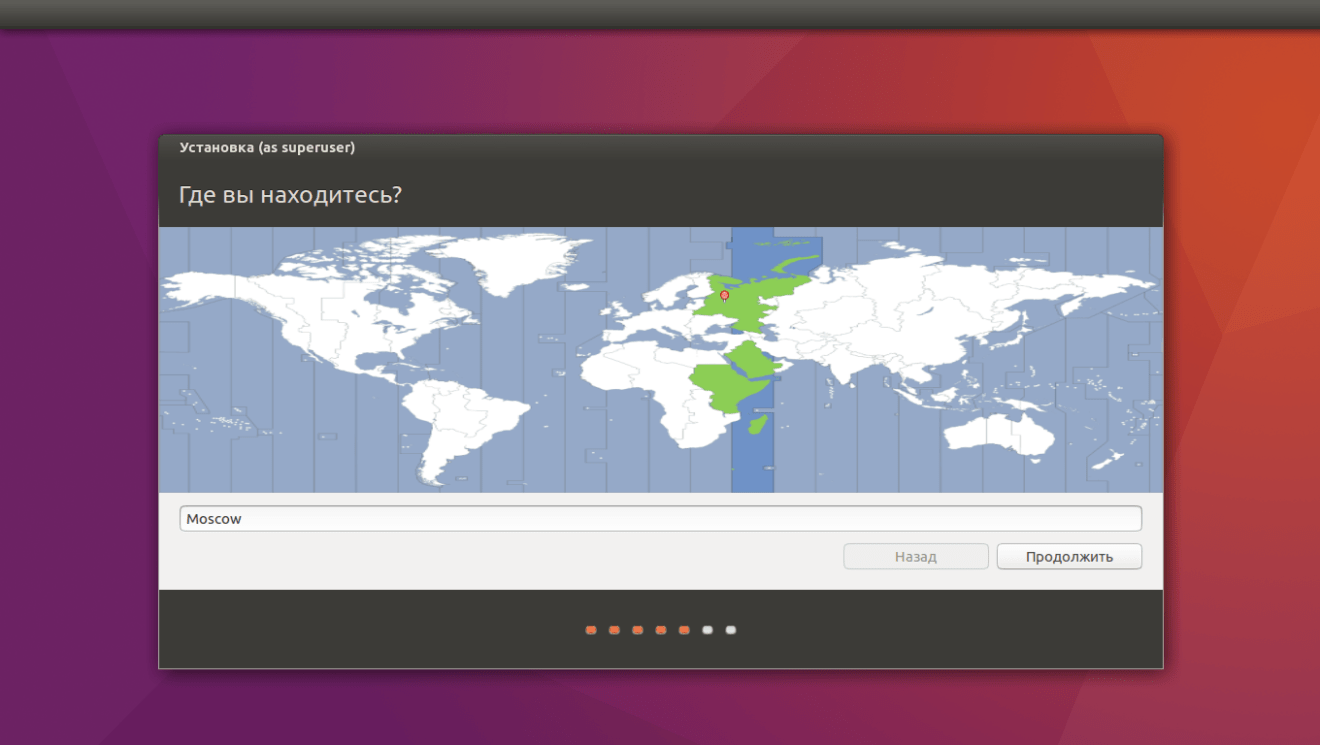
By clicking on the map or in the field below, we find our (or closest to ourselves) city, and click "Continue".

Also here we select the keyboard layout. We are looking for the desired one in the list, and then click "Continue".

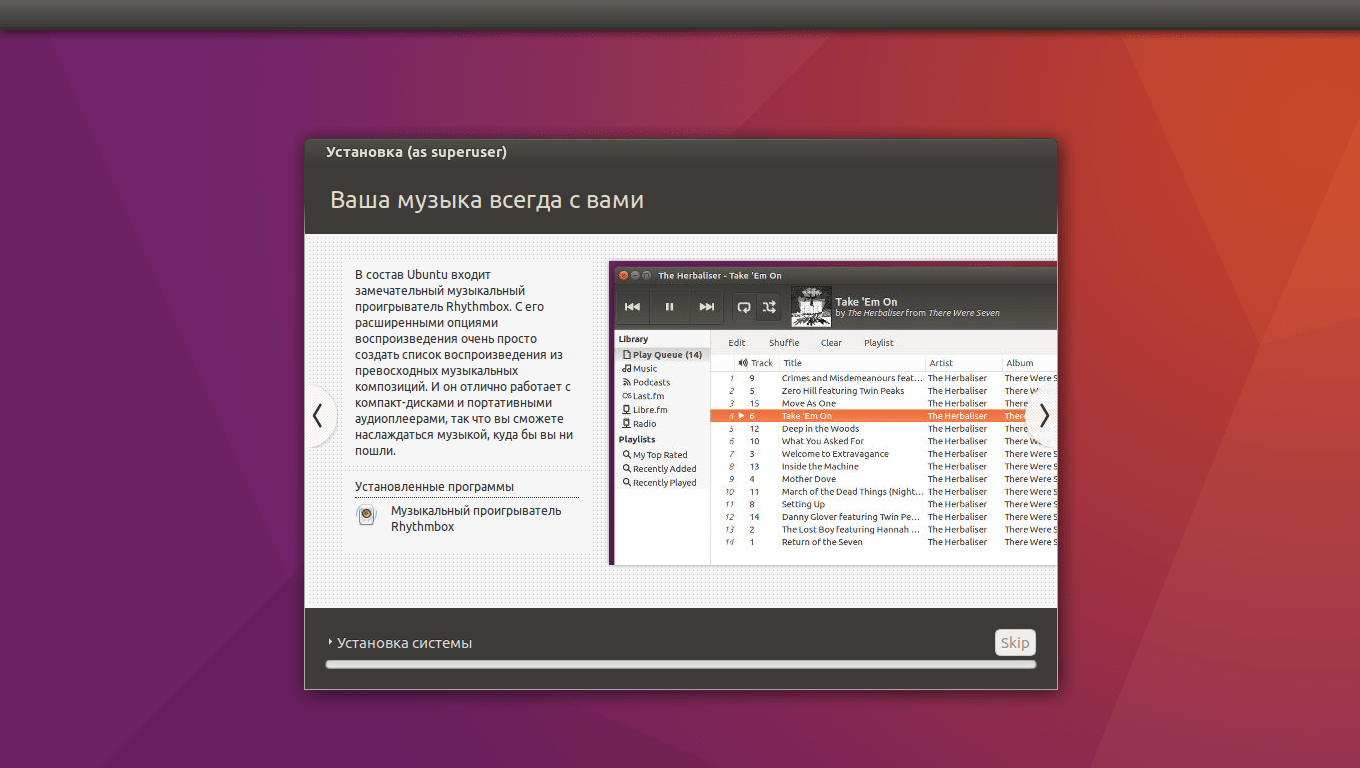
Voila - the installation of the system has begun and will end in about 15-20 minutes (depending on the power of your PC). At this time, you can flip through the wonderful slideshow that is built into the installer, which will allow you to fully familiarize yourself with the capabilities of the system you are installing.
Starting the system from Grub
After you complete all the above steps, your computer, when turned on, will ask you which of the two systems to boot. By default, if you have not selected a system, Ubuntu will automatically boot after 5 or 10 seconds. However, all this can be configured, or even remove the automatic download function.

conclusions
Ready! Now you can use two systems at the same time, deciding for yourself which one is more convenient in a given situation. As it turns out, installing Ubuntu alongside Windows 7 isn't that difficult. Especially if you use automated solutions (such as the "Install Ubuntu next to Windows 7" button). Anyway, I hope this article will help you figure it out and you won't experience problems.
Not so long ago, a new version of the now popular Linux distribution was released - Ubuntu 18.04. This release has brought a lot to the open source community. We can say that he set a new bar for the entire community. Beginners, however, do not really delve into all these subtleties. For a good start, they need to know exactly what to do in a given situation. Of course, in this case, you need to start with the installation. Due to the fact that the most practical and painless is the gradual transition from one operating system to another using dual block (having several operating systems on a PC with the ability to use both in turn), today we will consider installing Ubuntu 18.04 next to Windows. As an example, we will take the aforementioned version of Ubuntu and Windows 10. So, let's go.
Preparing for installation
Downloading the Ubuntu image from the official site
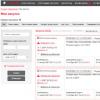
First, we need to download the image of the distribution kit being installed. To do this, we go to the official Ubuntu download page, where we select Ubuntu Desktop (home edition).

Boot partition (with UEFI):
- Size: 1-2GB
- New Partition Type: Primary
- Use As: FAT32 File System
- Mount point: / boot / efi
Boot partition (no UEFI):
- Size: 1-2GB
- New Partition Type: Primary
- Location of the new section: Beginning of this space
- Use As: Ext2 File System
- Mount point: / boot
System partition:
- Size: 20-30GB
- Location of the new section: Beginning of this space
- Mount point: /
Home section:
- Size: leftovers
- New partition type: Boolean
- Location of the new section: Beginning of this space
- Use As: Ext4 Journaled File System
- Mount point: / home
Basically, that's it. This is roughly what the manual disk partitioning looks like when installing Ubuntu. After all the manipulations, we proceed to the installation itself.
Location setting

In this window, we choose our location (for setting the time zone). Using the map, you can choose your city or the one closest to you.
User setting

Just enter your name or any other word in the top field. All this stuff will be copied into two fields below (a postfix will be added in the third), the data in these fields, if you want, can change. We also set a password for logging into the system, and at the same time choose whether we need to log in automatically, without prompting for a password.
After setting up and filling in all the fields, click "Continue". The installation of the system will begin.

Completing the installation

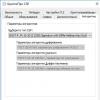
Immediately after the installation is complete, the system will prompt us to reboot to start using Ubuntu 18.04. Due to the fact that we installed Ubuntu alongside Windows, after rebooting we will see a Grub window that will look something like this:

Using the menu, we will be able to choose which operating system to boot into the computer. Here we can select other launch options.
We select Ubuntu 18.04 and wait for the system to boot.
Setting up Ubuntu 18.04 after installation

After logging in, we will be greeted by the following window. Before starting to use the system, we can familiarize ourselves with the contents of this small utility (something like a tour of the changes in the new version of Ubuntu with long-term support). With its help, we will be able to change some very important parameters, such as Livepatch - updating the Linux kernel without rebooting the operating system (more details).
Here you will be asked if you want to send anonymous information about the operation of the system to Canonical (it will help in improving the distribution kit), and at the end you will be "brought up to date" by providing information about the applications preinstalled in the system.

Check for available updates

And although at the beginning of the installation we already downloaded the updates (or maybe you missed this point), we should definitely check for the latest updates using the utility of the same name: "Application Update". We can also do this using the console command:
Sudo apt update && sudo apt upgrade
Minimize applications like in Windows
 .
.
Surely you will like this feature. It allows you to minimize all applications to the taskbar by clicking on the icon on this very panel. Windows behavior, but very convenient. To enable this feature, open a terminal and enter the following into it:
Gsettings set org.gnome.shell.extensions.dash-to-dock click-action "minimize"
Activate hidden options with Tweaks

There are some very useful features that are not available by default. To activate them in the system, you will need an appropriate utility. It's called Tweaks, and you can install it using this link.
Well, that's all. Have a good day:).