Contrary to popular belief, comics aren't just for kids. Comics can tell a story in a truly unique way, by adding images with emotion, you can break through the comic to the reader's soul with great success. As a rule, only those who can draw can create their own comics. However, now with the advent of special online generators for creating comics, this statement is not relevant. Anyone can create comics!
Use one of the suggested generators below and create your own personalities and interesting stories. So, let's look at 10 tools for creating comics online:
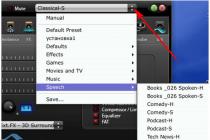
- Create comics with Marvel
Marvel Comics or Marvel Worldwide Inc. is an American comic book publisher. In this generator you can easily create comics, add characters, objects, backgrounds, conversation bubbles. Unfortunately, adding text in Russian will not work, since the fonts offered on the site do not support Cyrillic. - Bitstrips
It will help you create a cartoon version of yourself. Create your own character. You can embed it as a gmail mail. The service also offers a lot of cartoons for various occasions - for example, for birthday greetings, declarations of love and other important events.
See also what programs can be used for - MakeBeliefsComix.com
The service will help you quickly create your own picture with characters and dialogues. However, like the Marvel generator, there is no support for the Russian language.
- ToonDoo
Registration is required to use this service. ToonDoo gives free rein to your imagination. There is not only a gallery of ready-made characters here, but with the help of, you can create your own characters. In addition, on the service you can use your own photos and change them to your liking.
- Comic Master
Comic Master - the site was created using flash-technologies. This service will help you create comic book characters and invent stories with them. Registration required. Again there is no support for the Russian language ((
Chogger - No registration required, simple operation, you can sign in Russian, you can add a photo from your computer or even take a picture from your webcam.

- Pixton
Registration or authorization via facebook or google account is required. Simple generator. Click on the Pencil icon in the top left corner and start creating your story.
If you are thinking of creating your own comics, want to draw your own story - fictional or actually happened - graphic illustrations for the book, we will help you with this.
With us you will be able to realize your creative ideas at a good technical level, even if you have never painted before. To do this, you need to carefully read this review and familiarize yourself with our other drawing lessons, where we reveal in detail the individual technical nuances and techniques that you will need to create a comic.
For greater clarity, we will analyze the technique of drawing comics and, of course, the unique technique developed for this purpose by Aaron Schnorbitz, using a specific example of the online comic "Aaron Schnorbitz: The Beginning".
You can find the full Russian version of this autobiographical comic retrospective in our section "Comics. The original English version of the comic is at .
To facilitate the assimilation of the material, we will divide the process of drawing comics into several stages and analyze them separately. However, first we want to remind you:
Despite the fact that we are considering creating comics in the Illustrator CS5 graphics editor, you can draw them by analogy in other versions of this editor, graphics programs, and even on paper, using our tips in the article. "Drawing Lessons from A to W". We strongly recommend that you read this material, which will allow you to better understand the very essence of our method.
So, if you have looked at the articles to which the above links lead, you have already understood that for the graphic embodiment of our ideas, we use two main techniques - collage and tracing. We will use the same techniques in a similar sequence to create a comic and divide this process into the following steps:
For this we need:
a) Illustrator CS5 graphics editor, b) Internet connection, c) a brain capable of thinking logically, d) patience and desire to create
While the first two conditions (a,b) are optional, since you can create a comic by analogy with pencil, paper and printing press, the last two conditions (c,d) are mandatory.
Working on the idea of a future comic
The very first and most important step. You have to concretize and clarify (both from a general author's and technical point of view) the main points of your future comics.
First of all, you should be well think about the characters your comics, their features, habits, actions, scene. You must accurately imagine the character of your hero in order to build a correct and natural line of behavior for him, his appearance, manners. You must also choose the right context and setting (including other characters) for the action to take place.
Then you should think about the story- from start to finish and choose which events you want to highlight, that is, display them on the page in separate cells. At the end of this stage, you should already have a clear idea of what you want and how you want to display it on the pages. If you are new to this business, you should avoid ideas that are technically difficult to implement, such as comics with a large number of characters, or, for example, with detailed and complex landscapes (background pictures) or plots where photographic accuracy of characters is required and the display of complex emotions and gestures.
This stage should be approached very carefully, since any mistakes here can turn into real problems later in the drawing process (when you have already done quite a laborious job).
For example, if you think of an overly intricate plot and draw a few pages, you may suddenly realize that you need to draw 100 more pages to complete your story. In addition, by choosing a battle theme as a plot, you can very quickly get tired of drawing thousands of little people too much. Another fatal mistake may be the main character himself, from whom complex facial expressions are required.
Therefore, to begin with, choose a short story with a minimum of characters and simple scenery (background pictures).
Now let's explain this stage of the implementation of the comic on a specific example of the first two pages online. comic book “Aaron Schnorbitz: The Beginning”

Our task was to depict on the first two pages of the comic the events from the moment the fifteen-year-old father of Schnorbitz was arrested by FBI agents during the assassination of President D.F. Kennedy in Dallas to his (father, of course) marriage at 23 years old in exile in Billings!
At first glance, this is an impossible task. Display 8 years of a person's life on just two pages! A man known to us only from fragmentary descriptions of his eternally drunken son.
However, in practice, with a sound and consistent approach, everything turned out to be quite simple.
Characters: 15 year old guy. Since the comic reflects real events, we also made the behavior of our young hero extremely realistic. This is not a mutant hero with superpowers like Spider-Man, but a simple guy who fell under the millstones of a merciless system because of his curiosity. Faced with the FBI, he could only be frightened, resigned, humble and lament. The line of conduct here is extremely predictable and natural for such a situation. The appearance of the hero is ordinary.
The people around him are FBI agents. We also decided to make them look as real as possible - cold-blooded, callous, blunt, in classic black suits and glasses.
Scene: Dallas, where the Kennedy assassination took place, and Billngs. We immediately decided to either limit ourselves to the image of the general panorama, individual places and sights, or just a text description to make our work easier.
Narration: We clearly imagined the sequence of events and clearly knew which of them should be emphasized, and which should only be mentioned in the text of the narrative. We also knew very well that covering such a long period of our hero's life, the main part of the story should be presented with the help of accompanying text.Development of a preliminary script for the comic, writing the text
At this stage, you need to sketch out page sketches, roughly divide them into cells for illustrations, think through the script as deeply as possible, and write the text.
That is, you must already imagine what specific episodes of the narrative (or actions) you will illustrate, what plans you will use (large, general), how you will arrange these episodes and the corresponding text on the page.
you should understand clearly that a comic is a story told by a certain sequence of pictures with text (as a rule). The text can be divided into "off-screen" (narrative text), direct speech (the statements and thoughts of the characters are placed in classic "bubbles") and text illustrating various sounds.
When writing a script, you need to take all this into account. You have to think over everything so that all your illustrations fit on the given pages, so that they are arranged in a logical sequence and are not, for example, too small, and also, importantly, leave space for text. Text must be legible(both in location, size, and content).
It should be noted here that the text in the comic should read like in a book. from left to right and top down. Any liberties with this iron rule can lead to confusion. Always arrange "text bubbles" with this rule in mind.
Now let's look at our example:
In our narrative, we immediately identified for ourselves the key episodes that we wanted to display. They had to look spectacular and capacious, that is, they clearly and clearly illustrate the general line of the story even without the accompanying text. By cells in the appropriate sequence, we decided to arrange:
1st page: A sniper, a presidential cortege in sight, a frightened face of a hero-witness, arrest, imprisonment, release.
2nd page: arrival in Billings, guardian agents of the FBI, three static shots of a bored teenager at a gas station, the beautiful face of a future wife, newlyweds.
In order to better link all these illustrations into one storyline, we supplemented them with a voluminous text-narrative, which should explain to the reader the rapidly changing pictures and reveal the twists and turns of the plot. It is for this reason that we immediately put a lot of free space under it on the pages of the comic.
Then we wrote the text, which in terms of volume corresponded to the space allocated for it, approximately placing it in cells. In order not to shrink, we decided to place no more than 6-7 cells with drawings on each page. With such a density of drawings, an A4 comic page looks optimally saturated and detailed.
Finding the right material
Now that we have a preliminary page script of the comic, we need to prepare the basis for its rendering.
As you already understood, if you followed the links at the beginning of this article, we use Aaron Schnorbitz method, which implies that you have the most minimal artistic skills. This means that we will minimize the need to draw and, in general, will be engaged in stroke(tracing) of ready-made images, which we will "adjust" with collage for our specific scenario. Well, for this, these images need to be found.
In essence, this process is similar to finding and preparing material for painting a print on a T-shirt. In the article "How to draw a cool print on a T-shirt. Part 1" we cover this process in detail, so you it will be very helpful to read it! However, we will briefly describe to you once again our task at this stage and its solution.
So, having put the script-sketch of your comic in front of you, you have to find with the help of search engines on the Internet the images that correspond as closely as possible to those that you want to see in the cells of your comic, while immediately figuring out how you can fit them to your script. during the subsequent stroke.
Now it seems complicated, but in our specific example, you will now see the opposite.
Consider the first page of our comic. We decided to place the following images on it in the appropriate sequence: a sniper, the president's motorcade in the sight, the frightened face of the hero-witness, arrest, imprisonment, release.
Let's start by looking for an illustration for the first cell-picture of the comic - the sniper.
We open the browser and in the search engine in the search bar we simply type the word "sniper", press enter and switch to the "pictures" category. In order not to experience difficulties during further rendering, we select images of medium and large size (in Yandex - the column on the left). Details are clearly visible on them, which will not be superfluous for us when tracing. After that, we just have to choose the right picture.
When choosing a sniper for our picture, we were primarily guided by the fact that he should be depicted in profile (we initially wanted to point the barrel towards the right cell with a picture of a motorcade in the scope), his image should be wide and low so that he fits organically into a narrow cell height. We also tried to find a 1960s sniper to match the times when events are unfolding, however, as you noticed, we deviated a little from the rule and let the imagination run wild, making it more modern.
When the first picture was found, we proceeded to search for the second in the same way, and so on for all subsequent illustrations that we wanted to put on the pages of the comic. In the end, we collected all the images necessary for the subsequent work. Below are all the pictures we collected for the first page of the comic:

Finalization of the script and composition of the comic (collage)
Thus, having picked up all the illustrations necessary for the comic on the Internet (or in the printed press), you can begin to finalize the script and finalize the composition of pages and drawings in separate cells. To put it simply - now from the photographs and illustrations you have you need make a collage according to your idea - script, which you have already developed at the preliminary stage.
If you approached the creation of comics consistently and thoroughly, as we recommended to you, you should already have a good idea of how to arrange these drawings and "bubbles" with text. You just have to fit them together so that they look on the page the way you intended. And for this you need to cut off the extra edges of the images, change their scale, orientation (if necessary, again, if necessary) and fit them into the workspace, that is, the page.
Working in a graphics editor Illustrator, you can crop excess edges of photos with the tool Clipping mask (object > clipping mask > make), scale with scale tool (S), make a mirror image of the picture using Reflect tool (O).
With help Rectangle tool (R) and Ellipse tool (E) By making the background white and the stroke black, you can draw bubbles for the text. As a result, if, for example, we are talking about the first page of our comics, from the collected drawings above, you need to get what you see below on the right - already collage ready for stroke, which looks almost like a finished comic book page (lower left).

Here we will not delve into the purely technical details of implementing a collage for a comic book page in a graphic editor, since they are almost the same as those discussed in detail in our article. "How to make a cool drawing on a T-shirt yourself. Part 2". You just do everything by analogy with the "adjustment for the wind." We will just give you a hint on what points you should pay attention to on the example of our first page of the comic:
We placed all the photos we downloaded using the Place command (file> place) on the desktop - layer 1 (by default). In the document parameters, we chose the A4 format and, thereby, immediately marked the boundaries of our page and got a clear picture of which photos should be cropped, reduced or slightly enlarged relative to each other so that they fit into the workspace, taking into account the indent under the margins and space under "bubbles" with text.
We split the text into parts (according to bubbles) and placed them on the same layer. In this layer, we needed the text primarily in order to more accurately determine the size of the "bubbles". In particular, for this we immediately selected the font and its size, as well as based on the considerations listed in the previous sections of the article.
Having pre-composed the photos in the A4 working area, we proceeded to fit them, starting with the first image - the sniper. We placed it in the upper left corner under the large white square "bubble" field, where the introductory and rather voluminous part of the text should have been placed. We cut off the lower and unnecessary part of the photo. Another "bubble" with text took its place. Thus, we consistently composed our page from the upper left to the lower right corner, actively using the scaling tool.
To be honest, the collage of the first page of our online comic was easy to implement, as well-chosen images did not require any more complex changes, except for scaling and mirroring. However, if this were required, as, for example, on the second page of the comic (see the figure below - the top two cells made up of several images), the process itself would only become a little more complicated (we would have to first make a collage of individual cells of the comic), but no way would not change.
Stroke and adjust the collage
Having created a comic book page from photos and illustrations fitted to each other, as well as "bubbles" with text (see the figure above), you need to start drawing your comic book, or rather, tracing the resulting photo collage and making the necessary changes to it (sequence of actions and technique exactly the same as described)
For the most part, all we've done so far has been the painstaking preparation for this stroke process, which is at the heart of our drawing method and produces classic comic book pages. The more responsibly and thoroughly you approached the previous stages, the easier it will be for you to draw at this stage, since the key to creating a beautiful drawing at this stage is the most accurately and reasonably selected by you earlier photos for stroke, which, with the right approach, are required when drawing making minimal changes.
What changes will we make? Conventionally, they can be divided into important and cosmetic:
Important changes are those changes that determine the plot, the appearance of the characters and, especially, the protagonist. In other words, these are changes that allow you to link all your pictures into a single story, and without which your comic will be incomprehensible.
For example, if you take a collage for our first page of a comic (see the figure above), you will see that the person-prototype of our main character is different in all cells, and we need to make it the same, since according to our scenario, this is the same person. - teenager. Therefore, we need to make important changes when stroking. To simplify our task, we endowed our teenager with a remarkable hairstyle, which, in principle, determines his appearance, especially with a general drawing. In addition, we tried to slightly narrow its contours to give it a more slender and fragile look.
Among the important changes, we can also include the black suits of the FBI, which were not in the original photographs. The image below shows this perfectly, as well as the changes we made to turn the old man into a teenager.

Cosmetic changes include adjustments that do not affect the plot and its perception, such as the addition of background details, small elements of clothing, etc.
Advice: As a rule, in all comics there is a main character (or several), who is depicted in a variety of plans and angles on almost every page of the comic, since the story is essentially built around him. The more recognizable he is among all the other characters, the more monolithic and convincing your comic will look. To do this, you should make the appearance of the hero more remarkable. They gave him special marks. This may be an unusual hairstyle, beard, glasses, characteristic clothing, etc. depending on your history. You can even just highlight his clothes in a special color, which throughout the story will automatically be associated with your character by the reader.
Important! Before making changes, calculate your strengths. Do not try to finish something complicated that requires artistic skills from you. All drawing should be simple and obvious.

Filling in comic text fields
The last step remains: filling in the text fields - the so-called "bubbles" of the comic. Recall that the text for your page should have been ready and edited at the second stage of creating your comic, and also divided into separate blocks, since based on their volume, we calculated the size of the bubbles, substituting them for “fitting”, and accordingly corrected the drawings in individual cells and the overall composition on the page. However, we didn't put the text in the bubbles right away, but left them empty for a number of reasons:
First: As a rule, even after careful study, text is often edited afterwards. No matter how you check it, sometimes even obvious errors creep into the text. In addition, after reading it with a fresh mind after some time, the author often makes stylistic changes to it so that it sounds better, more natural.
Second reason: Even if the text is not subjected to further editing, in the future there may be the need to translate it into another language, for example, to participate in an international competition or exhibition.
Possible third reason: Font change, particularly when printing a comic on smaller paper, or size reduction In the digital version, sometimes it becomes necessary to choose a less beautiful, but readable print font.
This factor should be immediately taken into account when initially choosing a font for a comic (see at the beginning of the article) and avoid capitalization and overly intricate fonts, which, when reduced, will turn into unreadable curls.
So, taking into account all the above requirements, we create in Illustrator new top layer specifically for text. This is done so that by locking the main layer with drawings, it would be more convenient for you to separately format and edit the text of the page, without fear of accidentally making unwanted changes to the drawings, or accidentally erasing something.
In case you draw comics on paper, you just have to leave the bubbles of the original page blank, make a few high-resolution photocopies, and fill the bubbles with text already in them. Thus, you will always have a clean template for working with text at hand.
One last thing: Try to format the text in such a way that so that there is always more free space in the bubble than needed. Thus, you are more likely to insure yourself against lack of space in possible future editing or translation of the text.
Good luck! If you have any questions - leave comments, we will answer them. You can also join our VKontakte and Facebook groups by clicking on the corresponding icons on the page CONTACTS.
Paul Holden, an Irish artist, talked about his drawing techniques and tricks, as well as some tips to help you create your own comic in Manga Studio.
Drawing comics is a skill that requires knowledge of anatomy, light and shadow, architecture and many other things, all of which work towards the same goal - to tell a story.
One of the dangers is the possibility of getting lost in the details. You will very often find that you have fallen in love with some element of the comic, but in the context of the story, this element does not work.
1. Read the script!
Everything always starts with reading the script, because you need to understand the essence of the story. To become familiar with it well enough to get used to it, it is worth reading the script several times until you feel that you are ready to draw miniatures. Since the comic is supposed to convey the script to the reader, you must thoroughly understand the story you are drawing.
2. Miniatures

It is necessary to break the script into miniatures. At this stage, try to work with the placement of the characters in the frame and the size of the comic itself.
Usually, the more dialogs in one window, the larger it should be. Treat this stage with due responsibility, as you should not miss the details.
3. Layout

It is worth a little more work with the thumbnails. Layout is a bit boring, like the rest of the initial stages of comic book development. But this is worth the time.
It is necessary that the page looks like a full-fledged and independent story. To do this, you can make a long and large panel for one of the frames. Although, after reading this panel, it will quickly fade into the background and will no longer play a role.
4. Character design

Usually character design comes after reading the script. For those characters who appear once or twice throughout the entire comic, you can not spend too much time, since you will not need to think through their emotions and character. Well, the main characters, of course, will require much more effort.
5. Create a page

Never forget about page sizes. If they are indicated in your assignment, make sure that you have entered the correct numbers. If you are not sure what size the comic should be, then it is better to ask the customer about it.
We set the resolution to 600DPI, which is higher than what is usually required, but you never know if your work will be published again. And technology moves forward at a staggering pace, so it's best to play it safe.
Hotkeys: Move the page with Shift+Space (PC only). Hold down these keys and use your mouse or graphics tablet to move the page. Very handy for drawing.
6. Rough markings

Sketch a couple of scenes. Roughly position whatever you want to put on your page. Break the page into panels and work through the scene from the first one.
Still remember about the script at this stage and that the scenes should have enough room on the page.
7. Cut the page

Using your layout as a guide, create a new "Frame Folder" in Manga Studio, and cut the page using the "Cut Frame" tool.
This will split the page into a comic panel. Each panel will have its own folder, capable of having multiple layers within it. You can adjust the width of the panel border to your taste.
8. Set up the frame

At this stage, you are working on framing the frame. This is very important if you want to draw the reader into your world.
Since it was decided to make one panel a page high, let's start with building the city: setting up the perspective grid is very simple and quick if you use the Manga Studio rulers.
9. The old man and the tree

Now it is worth focusing on the expression on the old man's face. The tree helps frame his face, while the man's head and shoulders help frame the robots behind him.
10. Text

Dialogue in comics runs from left to right, so you need to make sure the scenes and characters are set up correctly, keeping this rule in mind. By neglecting this, you run the risk of ending up with overlapping dialogs, or worse, the wrong dialog for that panel.
11. Panel to panel
Panel four is a small copy of panel two, while panel five is a scene change, a two-way mirror that allows you to see the transition from one panel to another.
Remember that the background of each panel should match the scene and show that the scenes are related to each other. In short, the background should follow the overall story.
Hotkeys: You can switch colors between the foreground color and the background color using the X and C keys (for PC only).
12. Turn off the lights!

The robot enters a darker room. By leaving this panel in shadow and adding a silhouette, we easily signal that the scene and mood of the comic has changed. Assuming that the robot comes out of the door and the old man is located in the large window, we can say that something like a testing room is depicted.
13. Robot in the shadows

The original idea was to show the full face of the robot. But then it became clear that by leaving some mystery, we will make the robot a more powerful character. Therefore, it was decided to leave his face in shadow, thus creating a sense of mystery.
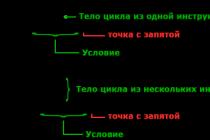
14. Full stop

The last panel of the last page of the comic should resonate - it's the final punctuation mark in the entire story.
The story and layouts were about an old man taking care of his tree, but at the last moment it was decided to use a stronger image that depicted the tree itself. This is a strong image that suggests that the old man is no longer capable of caring for the tree.
15. Changes

At this stage, you show your work to the customer and make changes to it. Perhaps it will be possible to come up with a different development of the plot, perhaps a new idea will arise. Also, sometimes it turns out that you have gone to a completely different steppe, and your comic does not correspond to the desired result. Then you have to redo everything.
16. Ink

We've done everything in pencil and it's time for the ink. We will work on the drawing using the Turnip pen.
Working on the tree is the most enjoyable part. You can work on its trunk and watch a TV show at the same time. While working on the tree, I decided to remove the borders of the panel, because without them the frame looked better.
17. And more ink

Using ink, you can work out light and shadow, add volume and texture to your frames and characters. You can add some effects with the Splatter pen, here already you have to completely rely on yourself, working through the drawing so that it looks decent.
18. Add strokes

One of the main features of manga is toning with elements such as circles, dots, etc. In Manga Studio, you can add texture by simply dragging and dropping the desired tones from the Materials folder. This allows you to highlight the elements of the foreground, without filling them with black, but simply giving them a texture.
19. Letters

No comic is complete without text, so from panel to panel you need to print dialogue and comments using lettering tools.
Make sure the text doesn't dominate the picture. Lettering is an art form that requires mastery in and of itself. By adding text, you can finally evaluate your comic and see how good it turned out.
Special brush: Pencil Side On

This tool allows you to draw rigid elements and fill in the required spaces with black.
Special brush: Spray Pen

This brush uses scanned ink splatters to create an interesting effect. This brush is great for painting stars or textures.
Making comics is fun and interesting. You can write an original story and bring it to life with illustrations - what could be better! A good comic touches readers emotionally and visually, combining a great story with vivid imagery. This genre allows you to show readers the characters and convey the atmosphere of the story in colorful detail. With a little thought over ideas, creating a draft and editing it, you can create a comic that will surely win the hearts of readers.
Steps
Brainstorm ideas
- Exposure. This is the opening part of the comic, which includes the setting, the main character, and the conflict. For example: a young alien living in a small town falls in love with a girl of the human race.
- Tie. This is an event that changes the life of the protagonist. For example: a human girl breaks up with her human boyfriend and is looking for a date for the school disco.
- Action development. This is where you develop the characters and explore their relationships. For example: an alien starts spending time with a girl after school, when she is preparing for an important exam.
- Climax. This is the high point of the story where the protagonist must make a major choice or decision. For example: an alien decides to invite a girl to dance during one of the training meetings. She agrees, and now the alien must figure out how to behave on a date at a disco.
- Winding Down This is the moment where the protagonist faces the consequences of his decision and is usually accompanied by action and intrigue. For example: an alien and a girl go to a dance, but everyone else is hostile to them. Then the alien has to deal with an angry mob of people chasing him and the girl at the dance.
- Interchange. This is the moment when the reader finds out where the protagonist ends up, and whether he succeeded or failed in achieving his goal or desire. For example: a girl stands up for an alien and they fly away together on a flying saucer.
-
Focus on an interesting protagonist or cast of characters. Create a memorable and unique main character. Give him special character traits and a peculiar view of the world. Avoid banal characters or those that may already be familiar to the reader.
- For example, you can create a main character who was born with a secret superpower and tries to hide it from others. Or the main character could be an alien who is trying to win the heart of a person.
- You can also focus on the composition of the characters to make the comic more meaningful (for example, adding information about a family or group of friends).
-
Explore the environment. Choose a setting that will add depth to the comic and make it interesting on a visual level. Choose a slightly surreal world so that you can add landscapes that the reader will be interested in looking at. You can also choose a familiar environment and make it a little weird or distorted.
- For example, a comic may take place on a planet similar to Earth, but inhabited by aliens rather than humans. Or you can add surreal elements to your hometown and make it the setting.
-
Choose a specific drawing style. Make your comic stand out by choosing a drawing style that you enjoy and are good at. You can use the style of manga or American comics as inspiration. Or maybe you should challenge yourself and try a new style of drawing. Choose a unique style that suits your ability and vision as an artist.
- In addition, it is worth choosing a drawing style that will not be difficult for you and take a lot of time. Once you've sketched a comic, you can always go back and make changes.
-
Draw a storyboard comics. Draw small panels (from the English. panel panel - a single picture, usually one of several others on a comic page; inside the panel there is a picture and text) on a blank sheet of paper. Then select the comic scene and draw it panel by panel. Add text to the bottom of the panels. Consider how you are going to represent the setting and characters in the scene. After that, you can try to storyboard several scenes to better understand how the comic will look on the page.
- You can make the panels the same size, or experiment with panels of different sizes.
-
Read examples of comics. To better understand the genre, read comics that have been published with great success. You can explore different styles to find what you like and resonate with. You can read:
Create a draft
-
Introduce characters and settings. The first few pages of your comic should tell the reader who and what it will be about. Start with a scene that shows the main character in action in the world around him. Or start with dialogue and images that tell the reader a little about the conflict between the main character and another character.
- For example, you can start with a scene where the main character is going to school. Then you can show his alien habits and imagine the school as the main setting in the comic.
-
Add conflict between characters. A good story is based on confrontation and tension between characters. Don't be afraid to put the main character in a difficult or confusing situation. Set a goal for him, and then put obstacles in his way to make it difficult for him to achieve it. You may also have conflict between the main character and his environment.
- For example, you can come up with disagreements between the main character and his boss. And then show the main character coming into conflict with his boss, or even beating him with his superpower.
-
Keep character traits consistent throughout the comic. Once you start drawing your comic, focus on a few key features of the character and try to display them in the same manner each time. Keep the same character traits from panel to panel to keep the comic cohesive.
- Draw the opening panels of the comic with a pencil so that you can correct them if necessary and keep the sequence.
- For example, you can come up with a characteristic hairstyle for the main character. Make sure to draw her the same or as similar as possible every time the character appears in the comic.
-
Make the environment detailed and conspicuous. Immerse the reader in the story by adding interesting elements to the setting. Pay as much attention to the setting as you do to the characters. Include items that are characteristic of the setting. This will help build the world of the story and keep the reader's attention.
- For example, if the setting is in a high school for aliens, you could add elements such as flying saucer parking spots, "How to pretend to be human" textbooks, and times for different time zones in the universe.
-
Add dialogue that will develop the character and the further course of the story. Dialogue in a comic should reveal the speaking character more to the reader. They also need to move the story forward at the plot level. Avoid generic lines like "Hi" or "How are you?" It is better to add phrases that characterize your heroes.
- So, you can give the main character a catchphrase, which he will often utter when frightened or surprised, for example: “Damn it!” - or: "Holy alien!"
- Some comics have very little or no dialogue. It's your comic and it's up to you to add dialogue to your characters or convey speech with illustrations.
-
End with a denouement or a dream come true. Like any good story, your comic should end with a solution to a problem. As a result, the main character can get what he wants, but at the cost of something. Or he may understand something about another character and thus let go of the situation. The story must close for the reader to enjoy the ending.
- You can add pictures demonstrating conflict resolution. Or insert a conversation between the main character and another character, where they both realized their mistakes or sorted out a misunderstanding.
-
If your comic is part of a series, use an ending with a twist. If you're writing one issue of a comic book series about the same character or setting, leave the reader in suspense. You can end with the phrase “To be continued…” or a picture that shows the reader that the story of the characters or the world you created is not over.
Edit the draft
Show the comic to others. Ask friends, family, and peers to read your draft. Get feedback from them on what they found interesting and original. Ask if they found the illustrations engaging and entertaining. Be open to constructive criticism from other people as this will only make your work stronger.
-
Plan the plot. A good comic begins with a strong story that forms the basis of the plot. Outline the main events in the comic using a six-part plot diagram:
You can even create your own original characters if you wish. We recommend using one of the 10 useful and convenient online tools from this collection.
Create Your Own Comic by Marvel
Marvel Comics or Marvel Worldwide Inc. is an American publisher of comics and related media. If there is a company that knows exactly what it takes to make a great comic book, it's Marvel.
This cool site is very easy to use. You can apply various scenes, characters and objects from the Marvel comics universe to create your own stories online.
Bitstrips
Bitstrips will help you create a cartoon version of yourself. You can get a new hairstyle, add some makeup, change the size of your face and outfit. In addition to the browser version, there is the Bitstrips application, which Apple users have recognized as one of the best downloaded applications.

MakeBeliefsComix.Com
MakeBeliefsComix.Com is a free comic book creation tool with lots of symbols, templates and tips. It is so easy to use that even a child can easily figure it out. However, there is one limitation here - color. You can change the background color, but the characters will remain black and white anyway.

ToonDoo
ToonDoo gives your imagination more freedom. Although it provides a standard set of symbols and background options, the service allows you to create your own wallpaper and even draw freely on some objects. In addition, you can use your photos in comics and manipulate them as you like.

Comic Master
Comic Master is a flash site that is easy to navigate. With this service, you can create your own characters and original stories for them. Here's a simple step-by-step process that starts with a mockup and ends with an amazingly completed comic.

Chogger
Chogger is a free comics creation service with a good collection of editing tools. You can use existing images or draw your own. With Chogger, you even have the option to take a picture via your webcam and paste it into your artwork. An option is also available to customize each added frame.

Pixton
Pixton is a drag-and-drop / drag-and-drop comic book creation tool that allows anyone to create their own masterpieces, regardless of their artistic talents. All you need to do is join the Pixton community and then you can start sharing your creations with others.

Strip Generator
The Strip Generator doesn't really give you much room to express your own style - you can only use existing icons and templates. However, there are many options to choose from. To make a comic, pick up a frame and drag characters and objects to it.

Write Comics
Write Comics is another easy site for creating comics and stories. You do not need to register or fill out various forms. Choose a menu background, character and speech bubbles. So just you have your own comic.